Manage User Directory
You can think of the GenAuth user directory as a directory that stores all your user information. You can search for users and view user information in the user directory; and manage user directory configurations, such as prohibiting registration and configuring whitelists; the schema of this user directory is extensible, and you can add custom user fields; at the same time, you can use multiple standard protocols (such as SAML, LDAP, OIDC, OAuth2.0) as an identity provider to provide external identity authentication capabilities.
If you want to know how to manage the user information of a single user, please see Manage User Accounts.
The following content is in no particular order. You can choose the content you are interested in to read:
- Learn what configuration items are available in the user directory;
- Learn how to add custom user fields;
- Learn how to search for users;
- Learn how to use the LDAP user directory.
User Directory Configuration Items
This article introduces some configuration items related to the user directory, such as registration prohibition, frequent registration restrictions, login failure limit, registration whitelist, etc.
Registration prohibition
You can turn on the registration prohibition switch in Security Settings->General Security->Registration Security in the console:
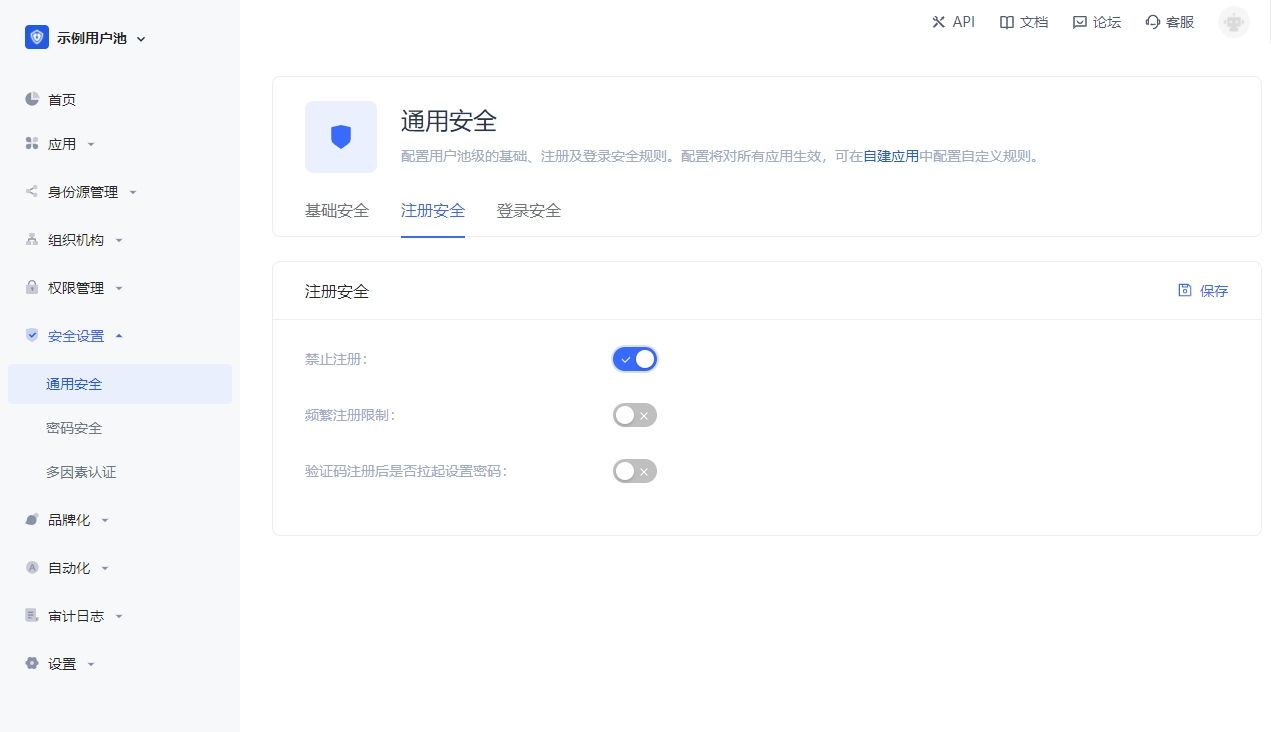
After turning on "registration prohibition", ordinary users will not be able to register through the login form or API, and only administrators can manually create accounts.
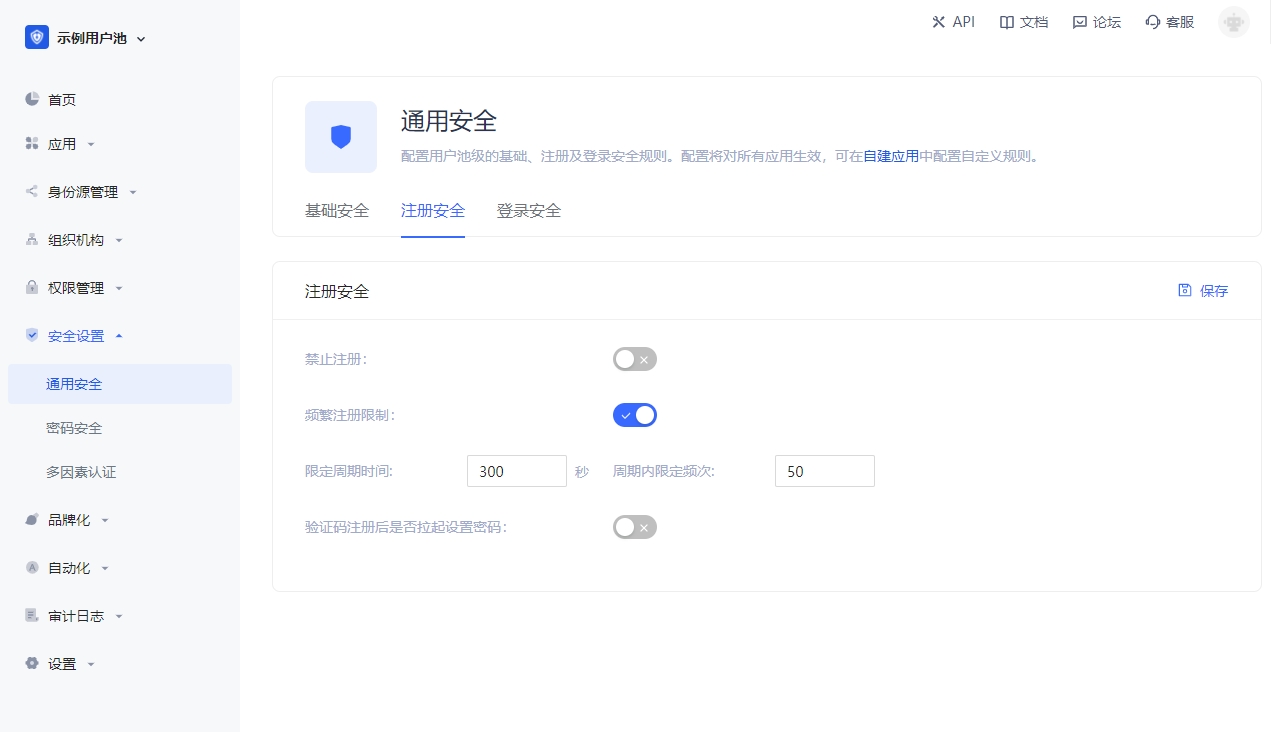
Frequent registration limit
You can turn on the Frequent registration limit switch in Security Settings->General Security->Registration Security of the console to limit the number of registrations within a certain number of seconds:
Login failure limit
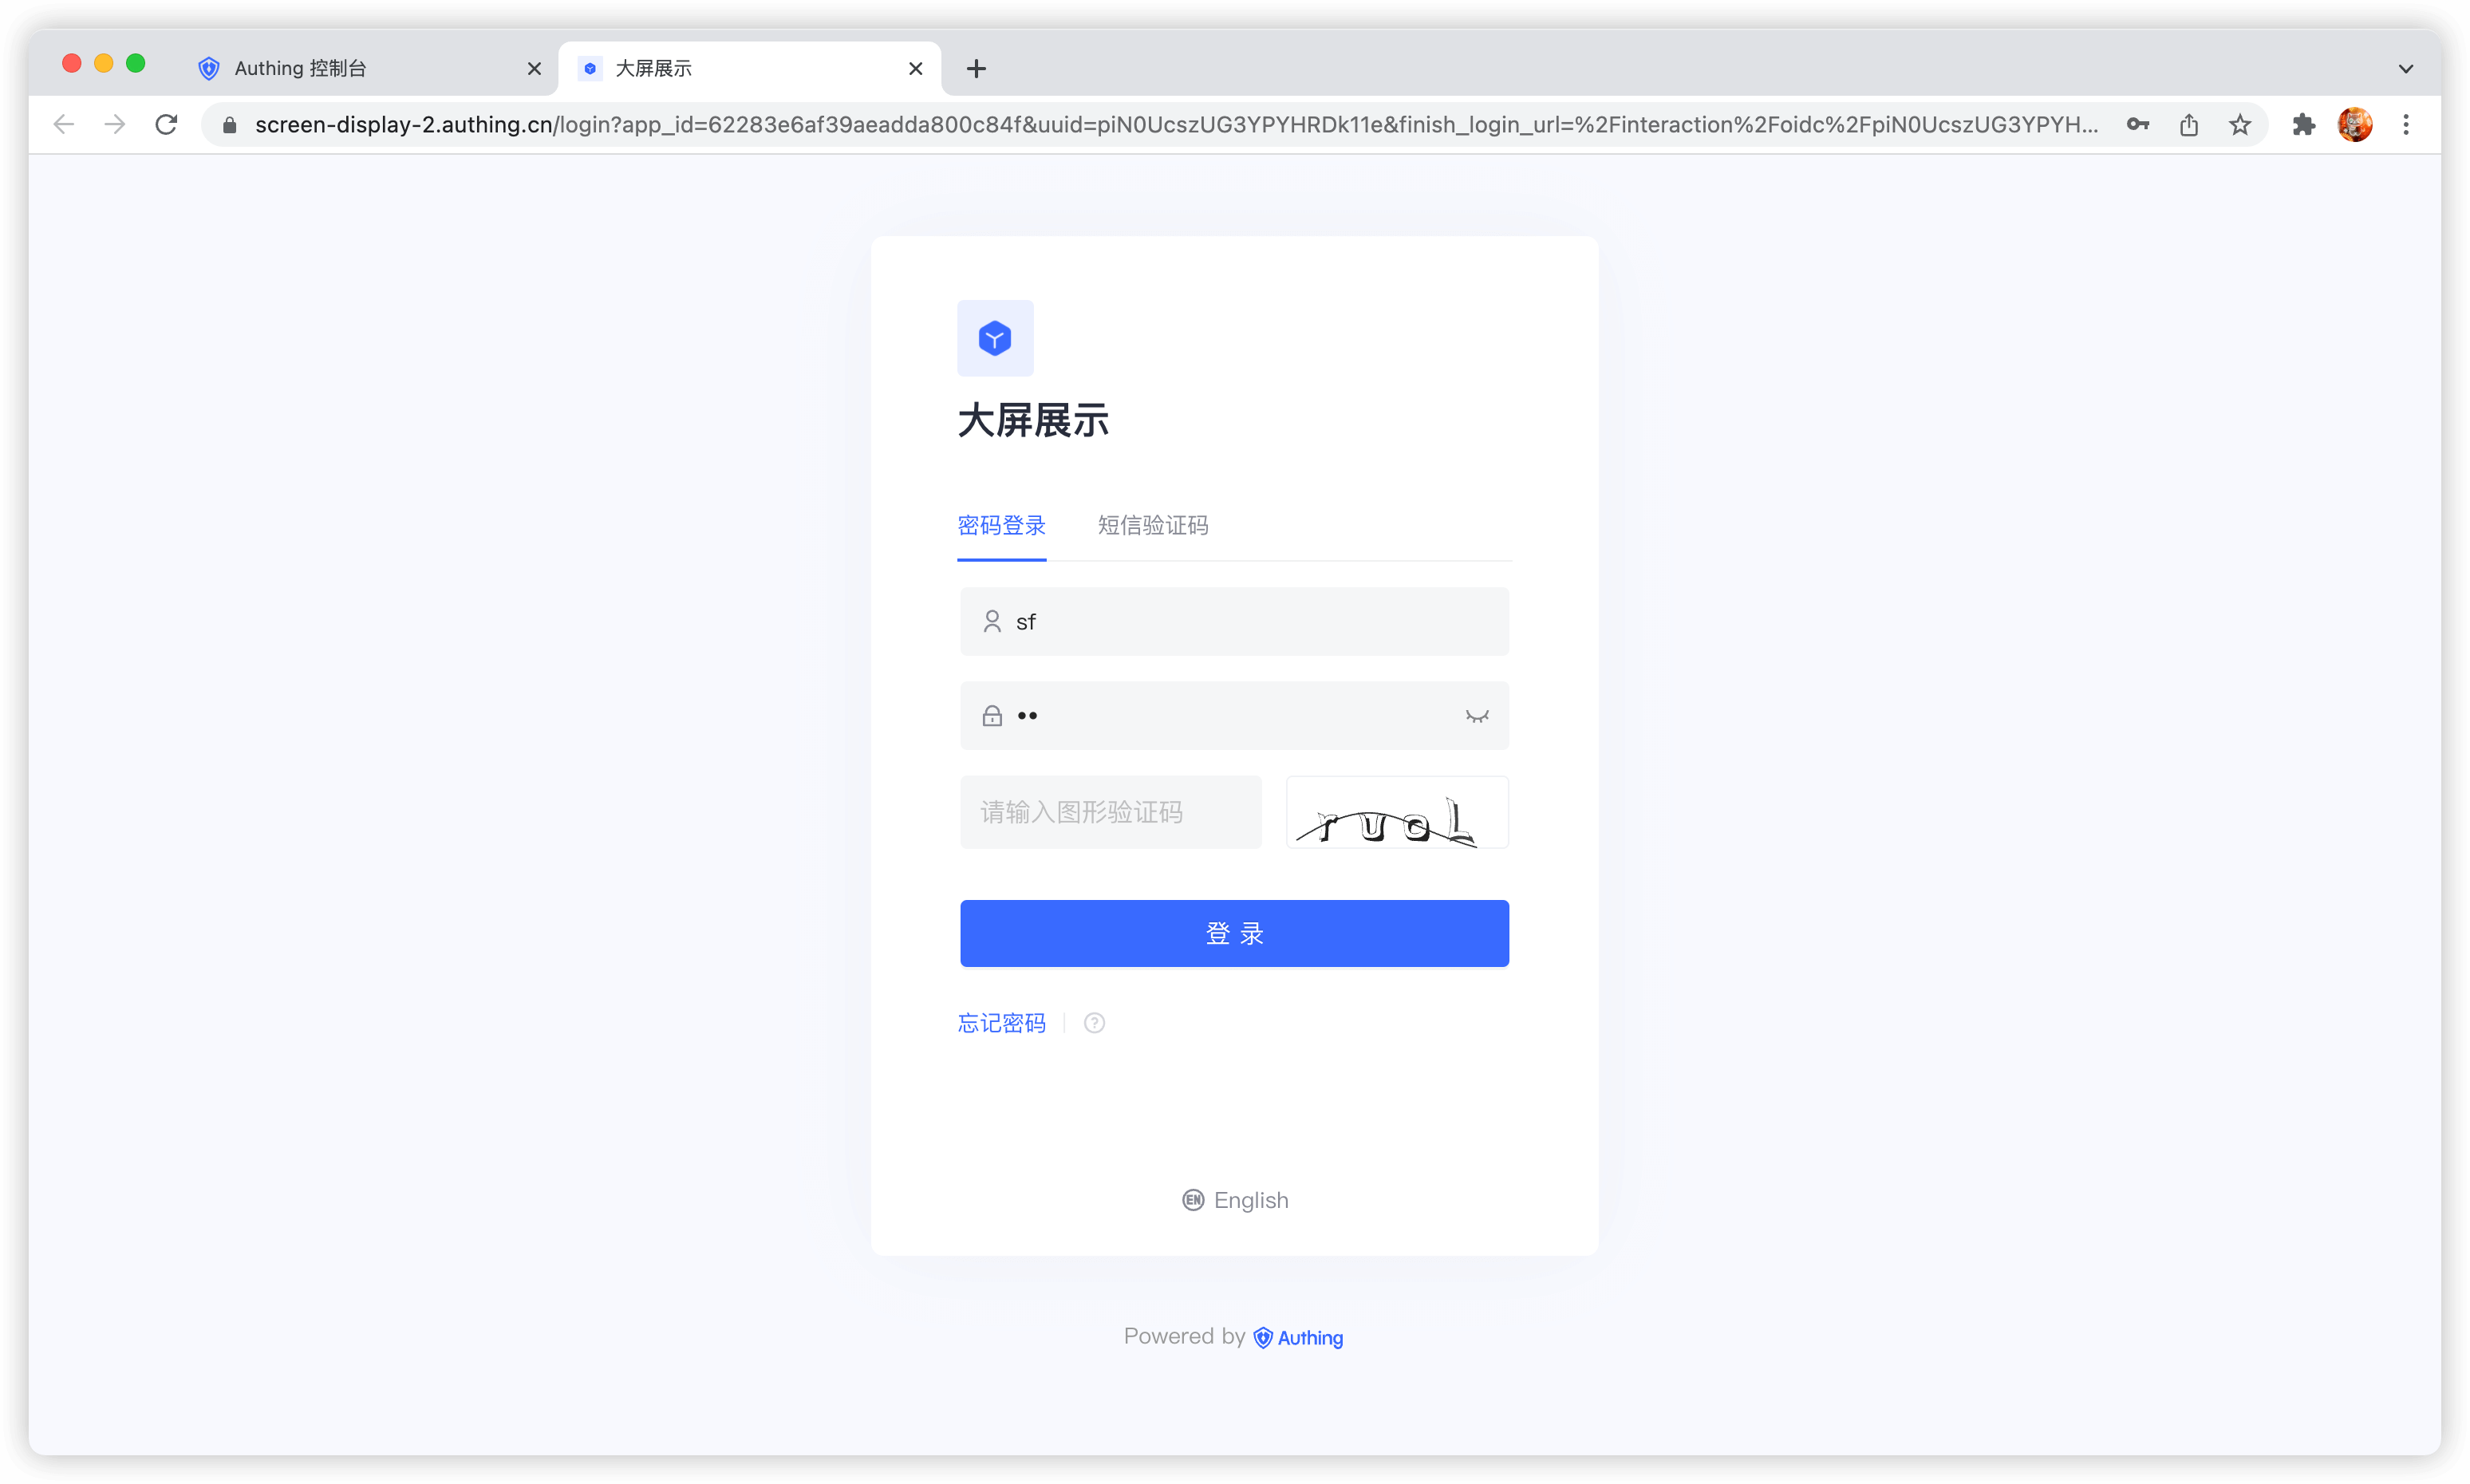
You can turn on the Login failure limit switch in Settings - Security Information of the console to limit the number of failed logins of the same account within a certain number of seconds:
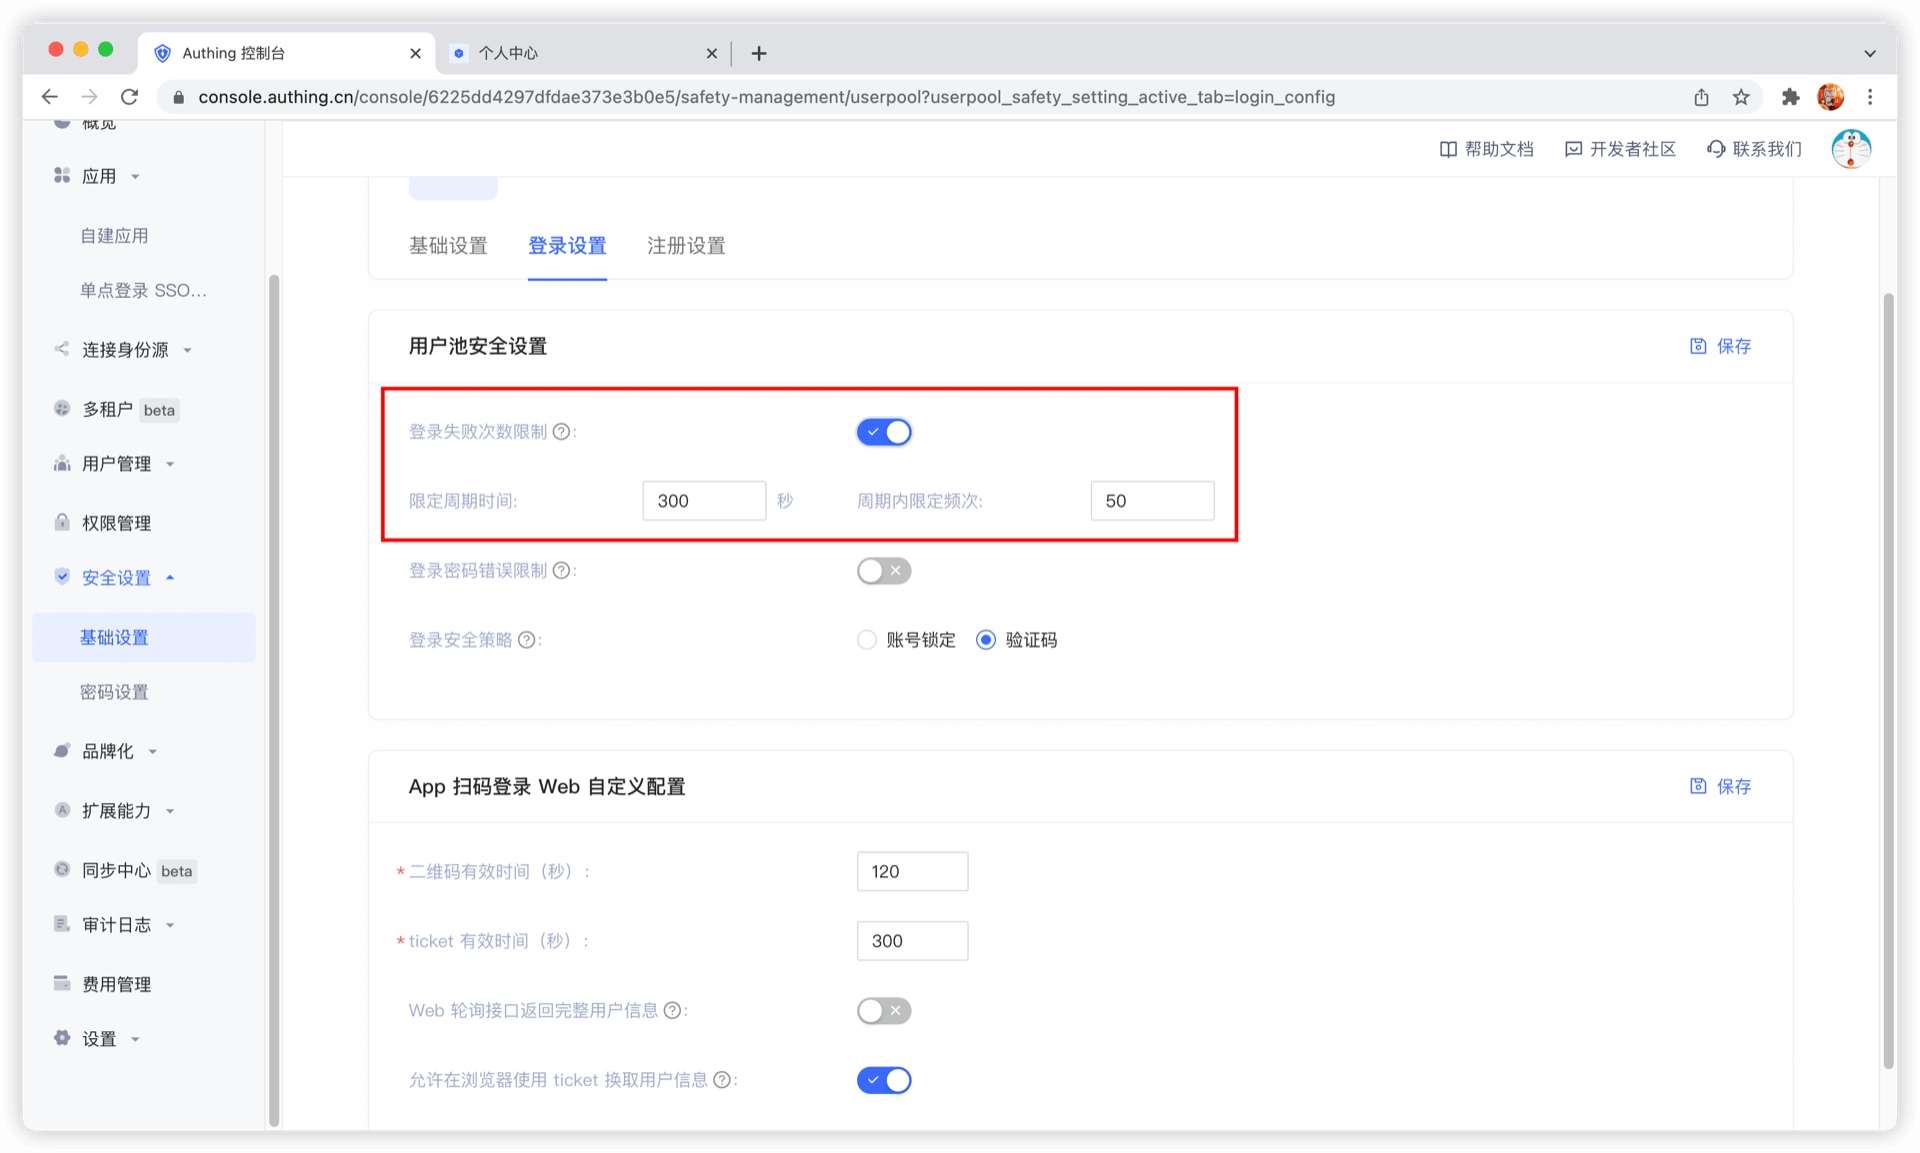
If the number of logins exceeds the specified time, the user needs to enter a graphic verification code to log in again:
Configure registration whitelist
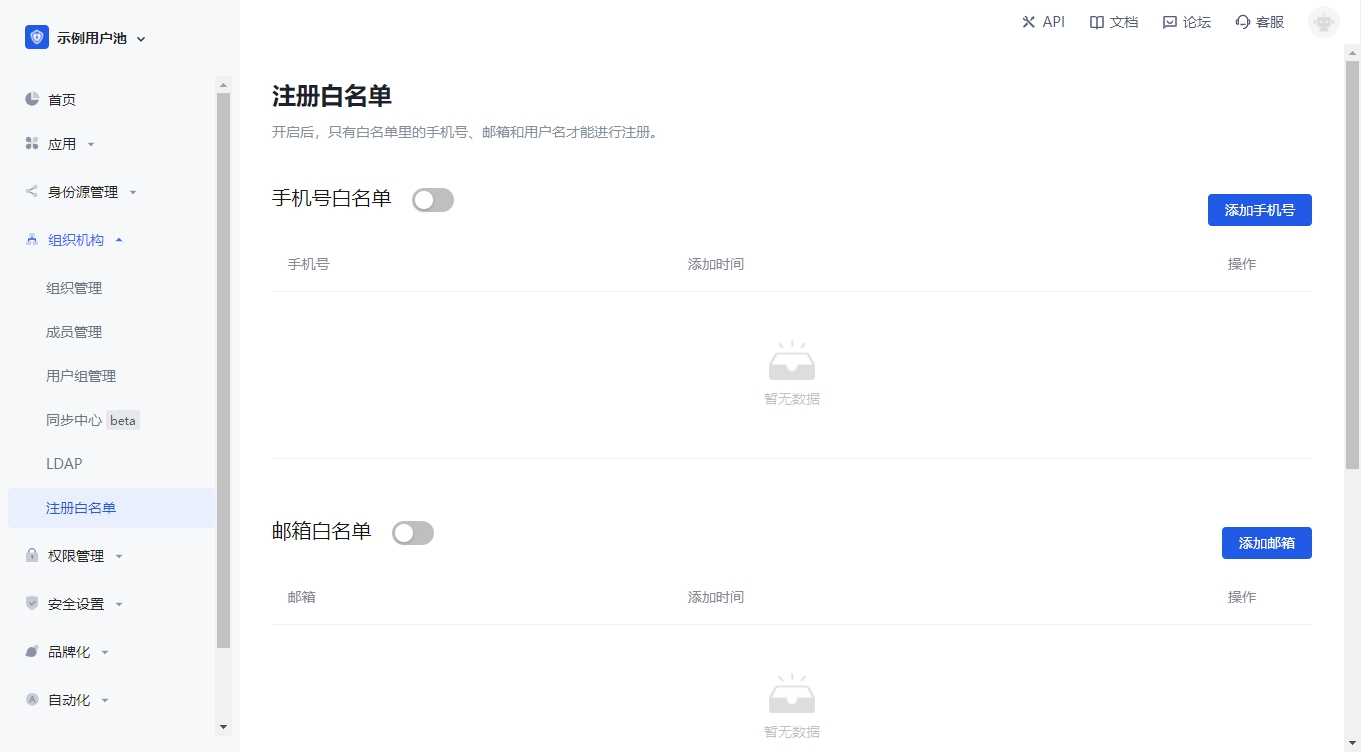
You can turn on the email, mobile phone number, and user name whitelist in Organization->Registration whitelist of the console. After turning it on, only the mobile phone numbers, email addresses, and user names in the whitelist can be registered (administrators manually create accounts without restrictions).
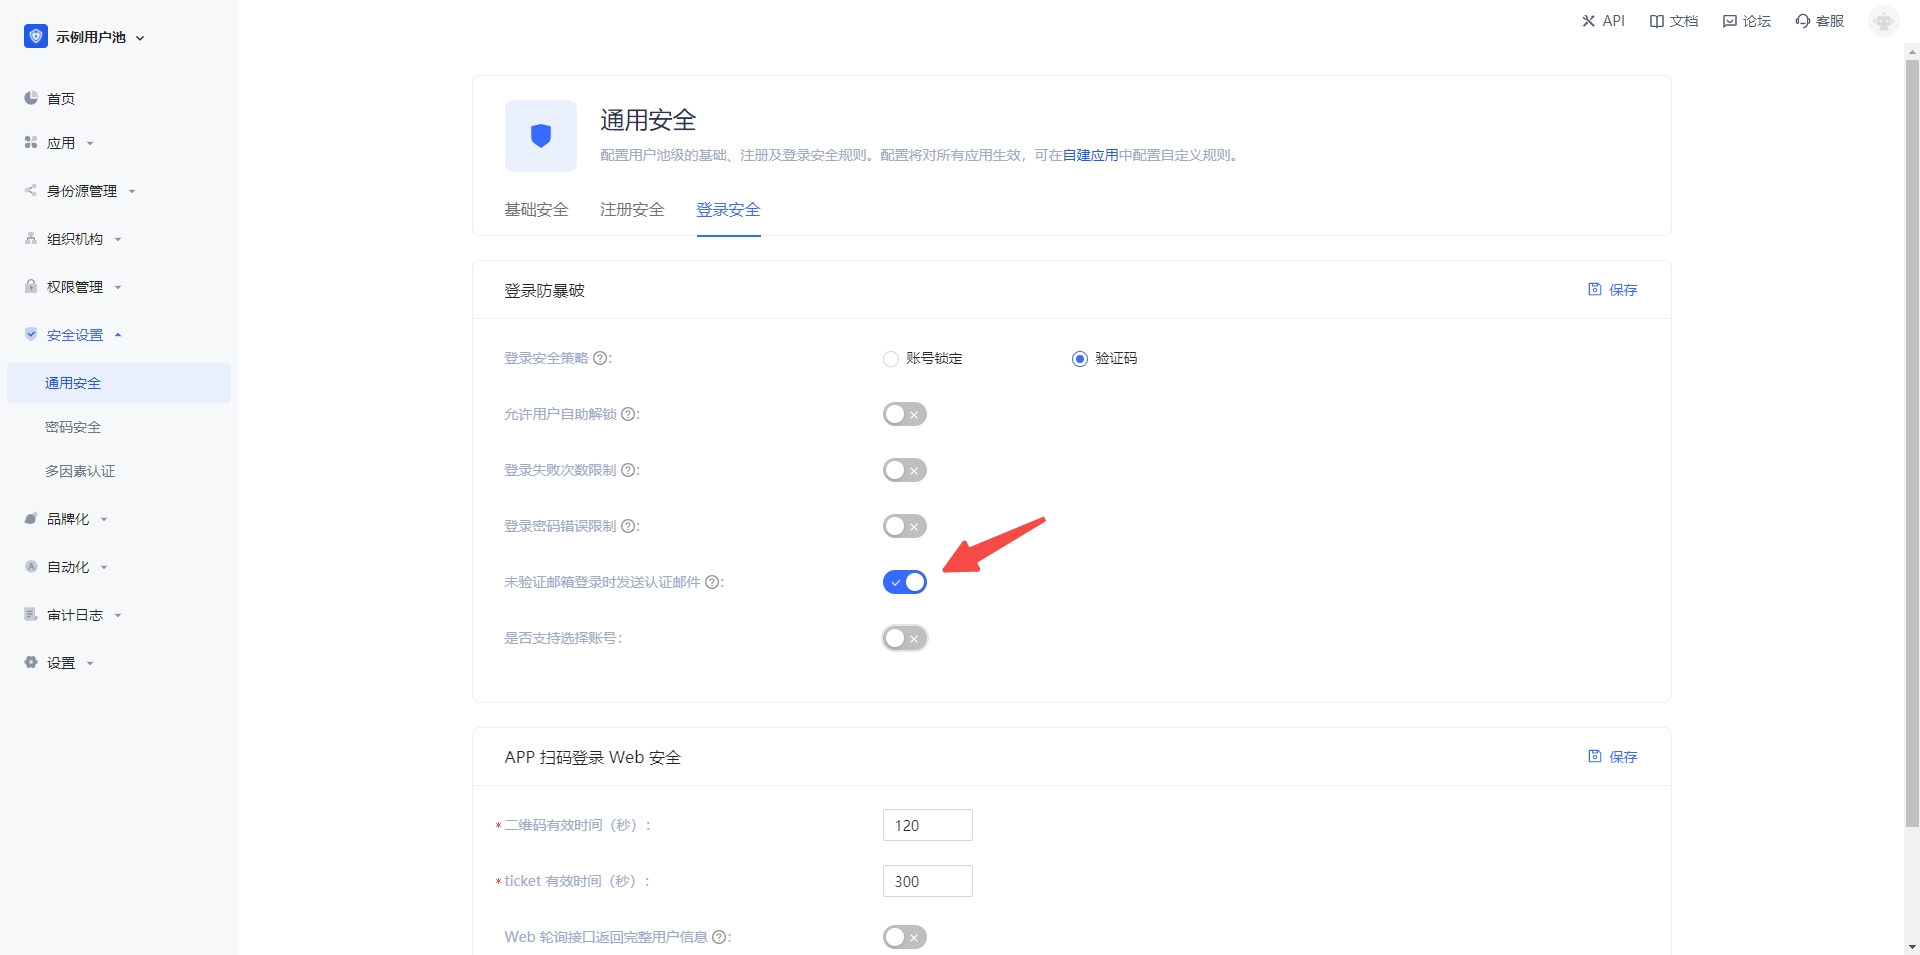
Disable login for users with unverified email addresses
By default, accounts with unverified email addresses can log in. You can also modify this configuration in Security Settings->General Security->Login Security:
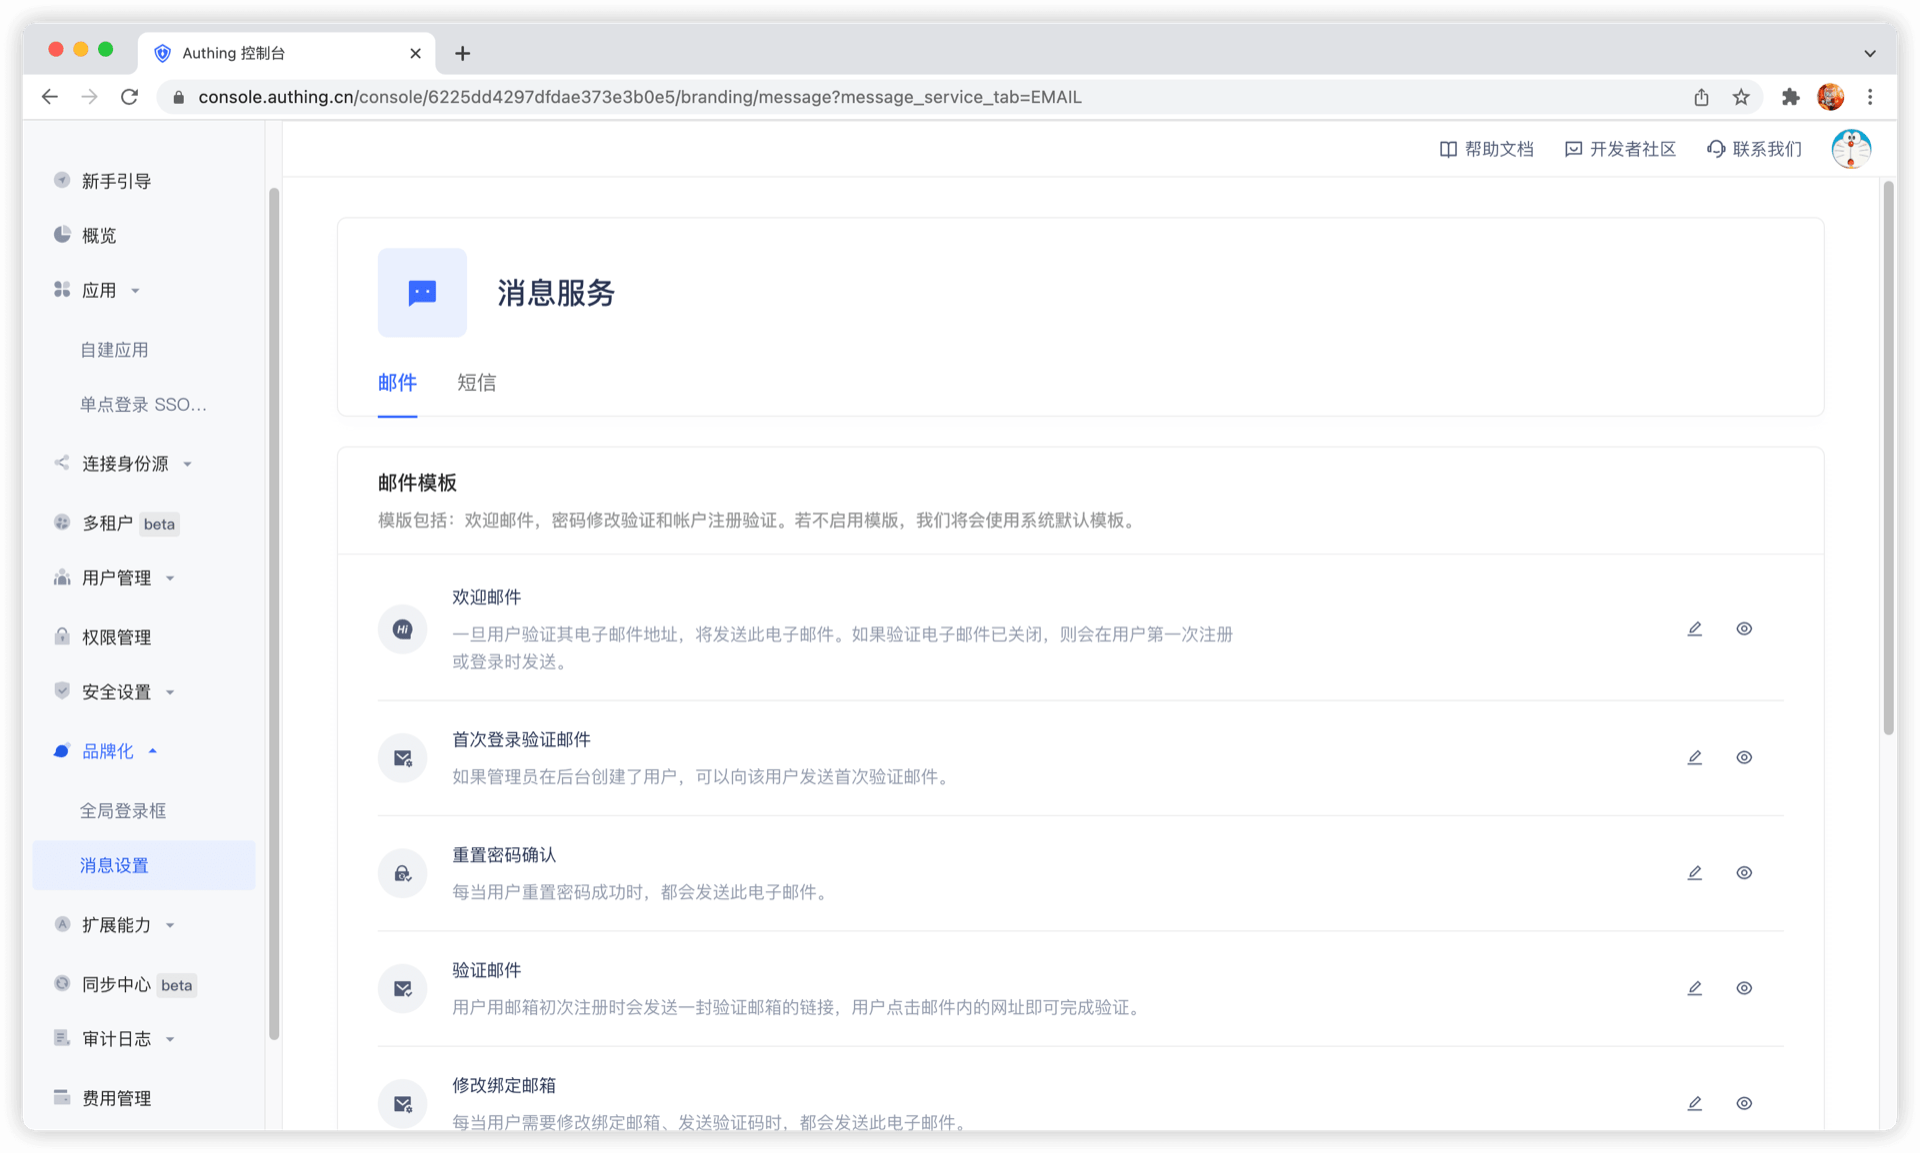
Send a welcome email when registering
No welcome email will be sent after turning it off.
You can customize the welcome email template.
Add custom user fields
User custom fields are additional fields that can be added to user objects in addition to basic user fields. Developers can store a small amount of business-related data by setting custom fields.
Configure custom user fields
You can define the following types of custom fields:
- String;
- Numeric;
- Date;
- Boolean;
- Enumeration;
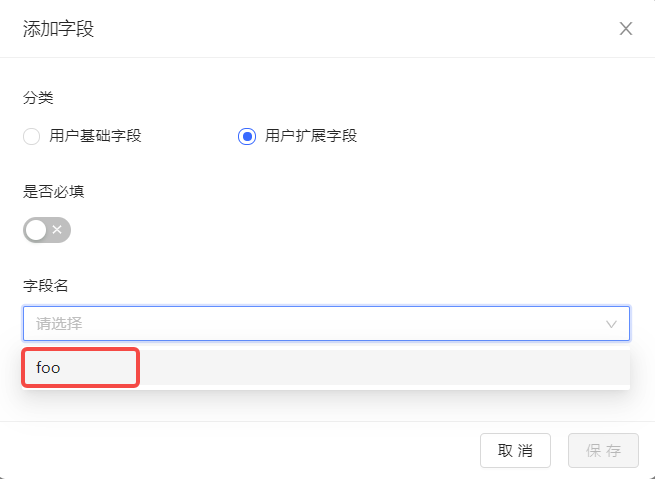
You can configure custom user fields on Settings - Field Management - User Extended Field page:
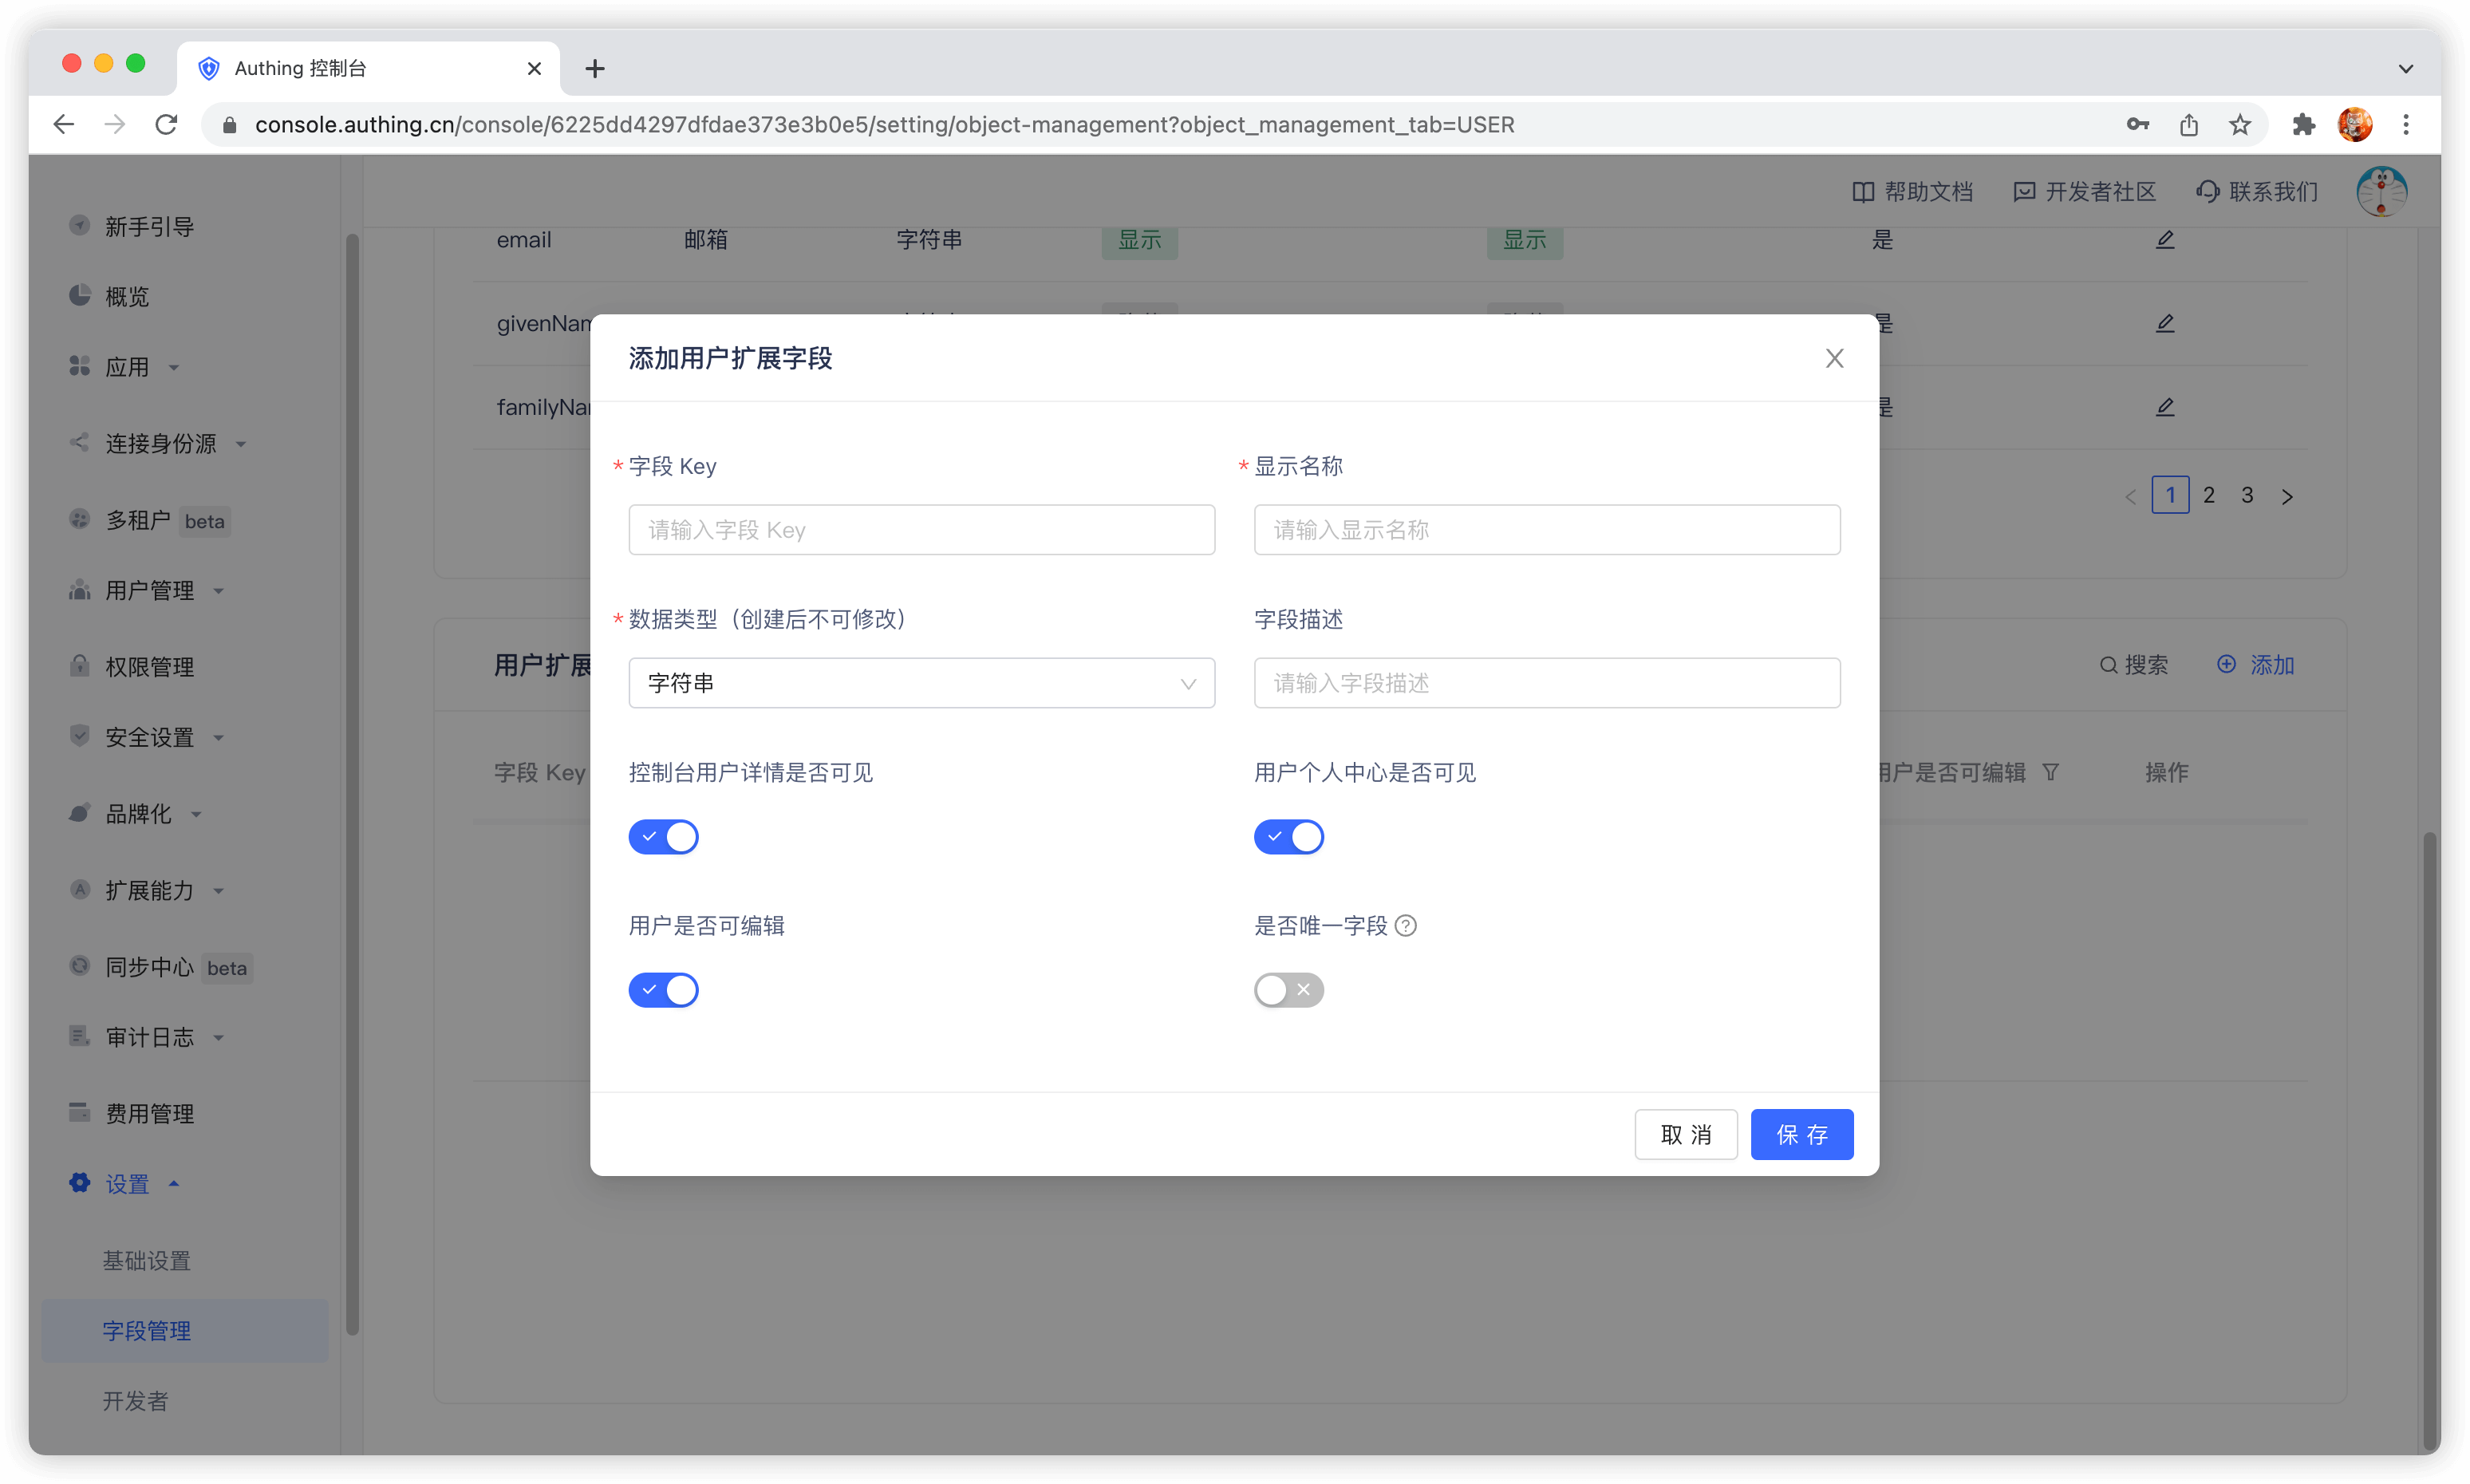
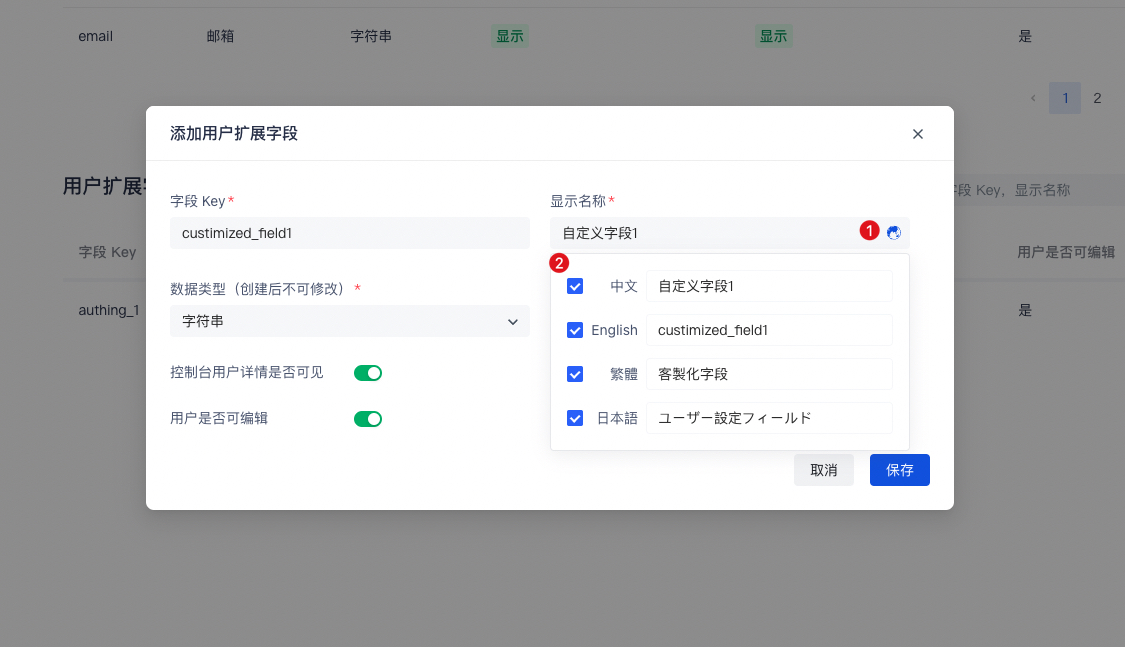
When naming a newly created custom field, you can edit the display name of the field in multiple language environments:
- Edit directly in the input box under "Display Name" to get the default displayed field name
- Check "Chinese" and edit the field display name in the Chinese environment
- Check "English" and edit the field display name in the English environment
- Check "Traditional" and edit the field display name in the Traditional Chinese environment
- Check "Japanese" and edit the field display name in the Japanese environment
In particular, if the display environment of the field is not included in the above four language environments, it will be displayed using the "default displayed field name" you configured.
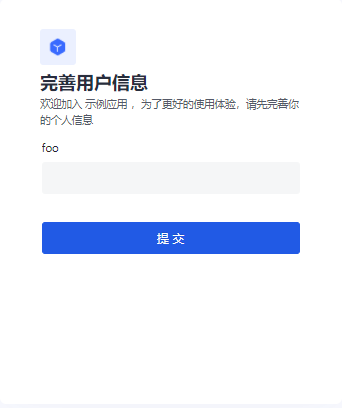
After configuring custom fields, you can open the registration information completion page of the application and let users complete the information of these custom fields.
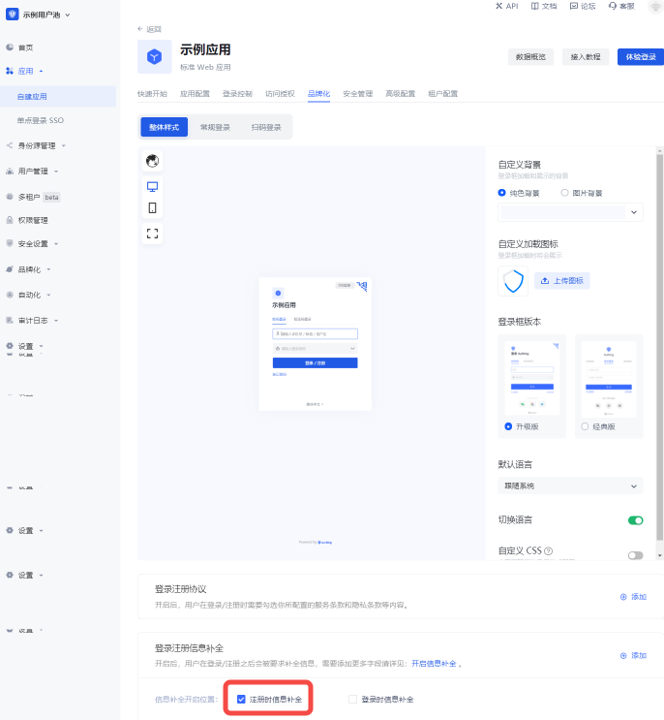
On the App Details - Advanced Configuration page, turn on Customize the login box of this application
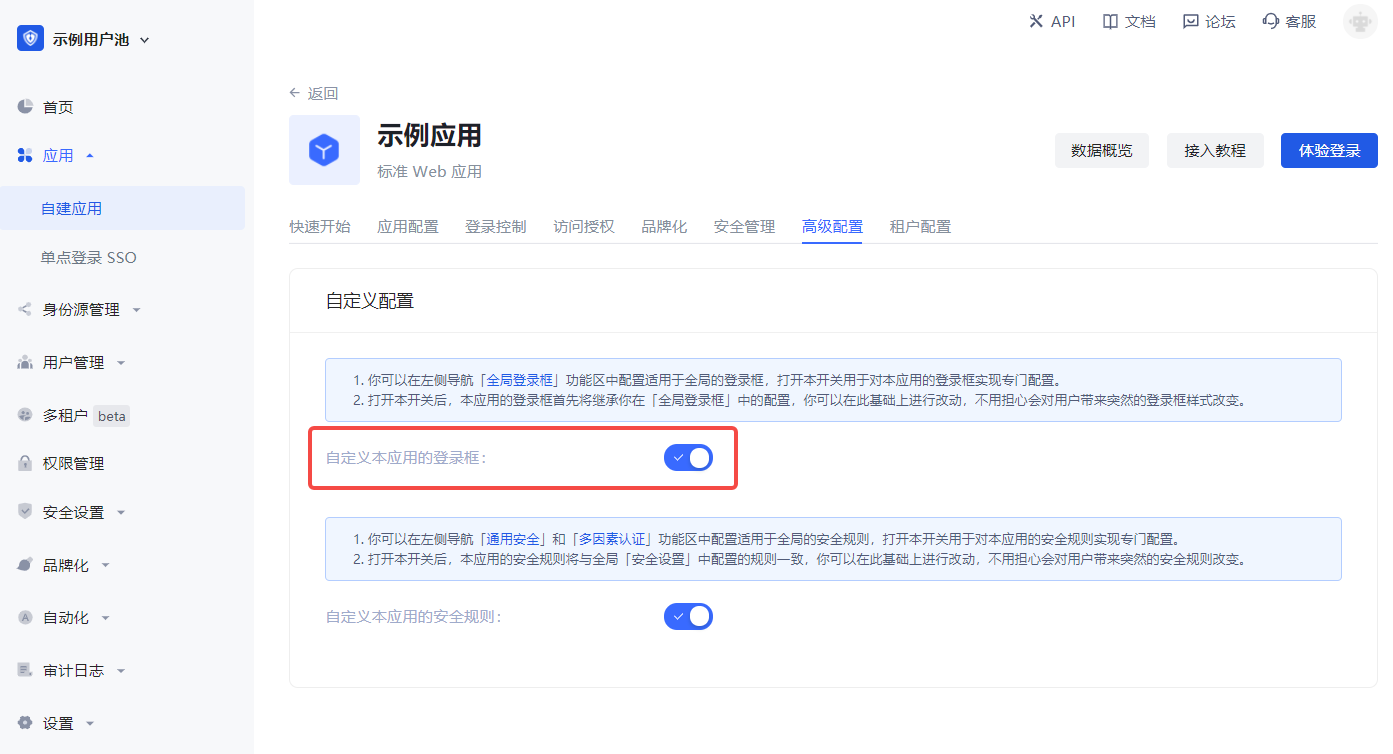
Then switch to Branding, check the Enable registration information completion switch, and then select the custom field you just added:
Data Type You can choose string, number, Boolean value, enumeration value, date, which will determine the final display style of the page.
Click Save and then visit the login page of the application.
After the user clicks register, he will be redirected to the following registration information completion page:
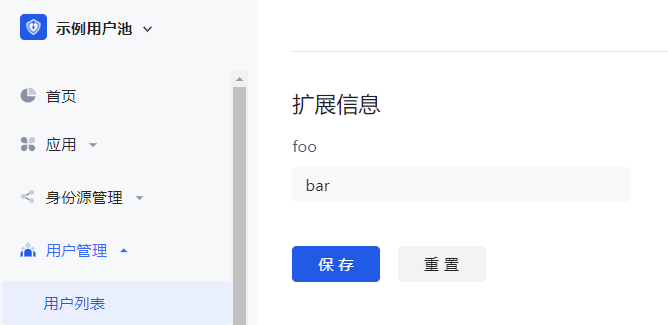
After the user successfully registers, you can see the custom field value just entered by the user on the user details page:
Use API & SDK to manage user custom data
GenAuth supports SDKs in multiple programming languages including Java, JavaScript/Node.js, Python, PHP, C#, Swift, Go, Ruby, WeChat Mini Program, etc. You can choose the SDK you are familiar with:
udfCode snippet: udf
Search user
GenAuth supports fuzzy search of users by email, username, phone number, nickname and other fields, and supports both [console](#use console search) and SDK modes:
Use console search
You can search users by keywords on the User Management - User List page:
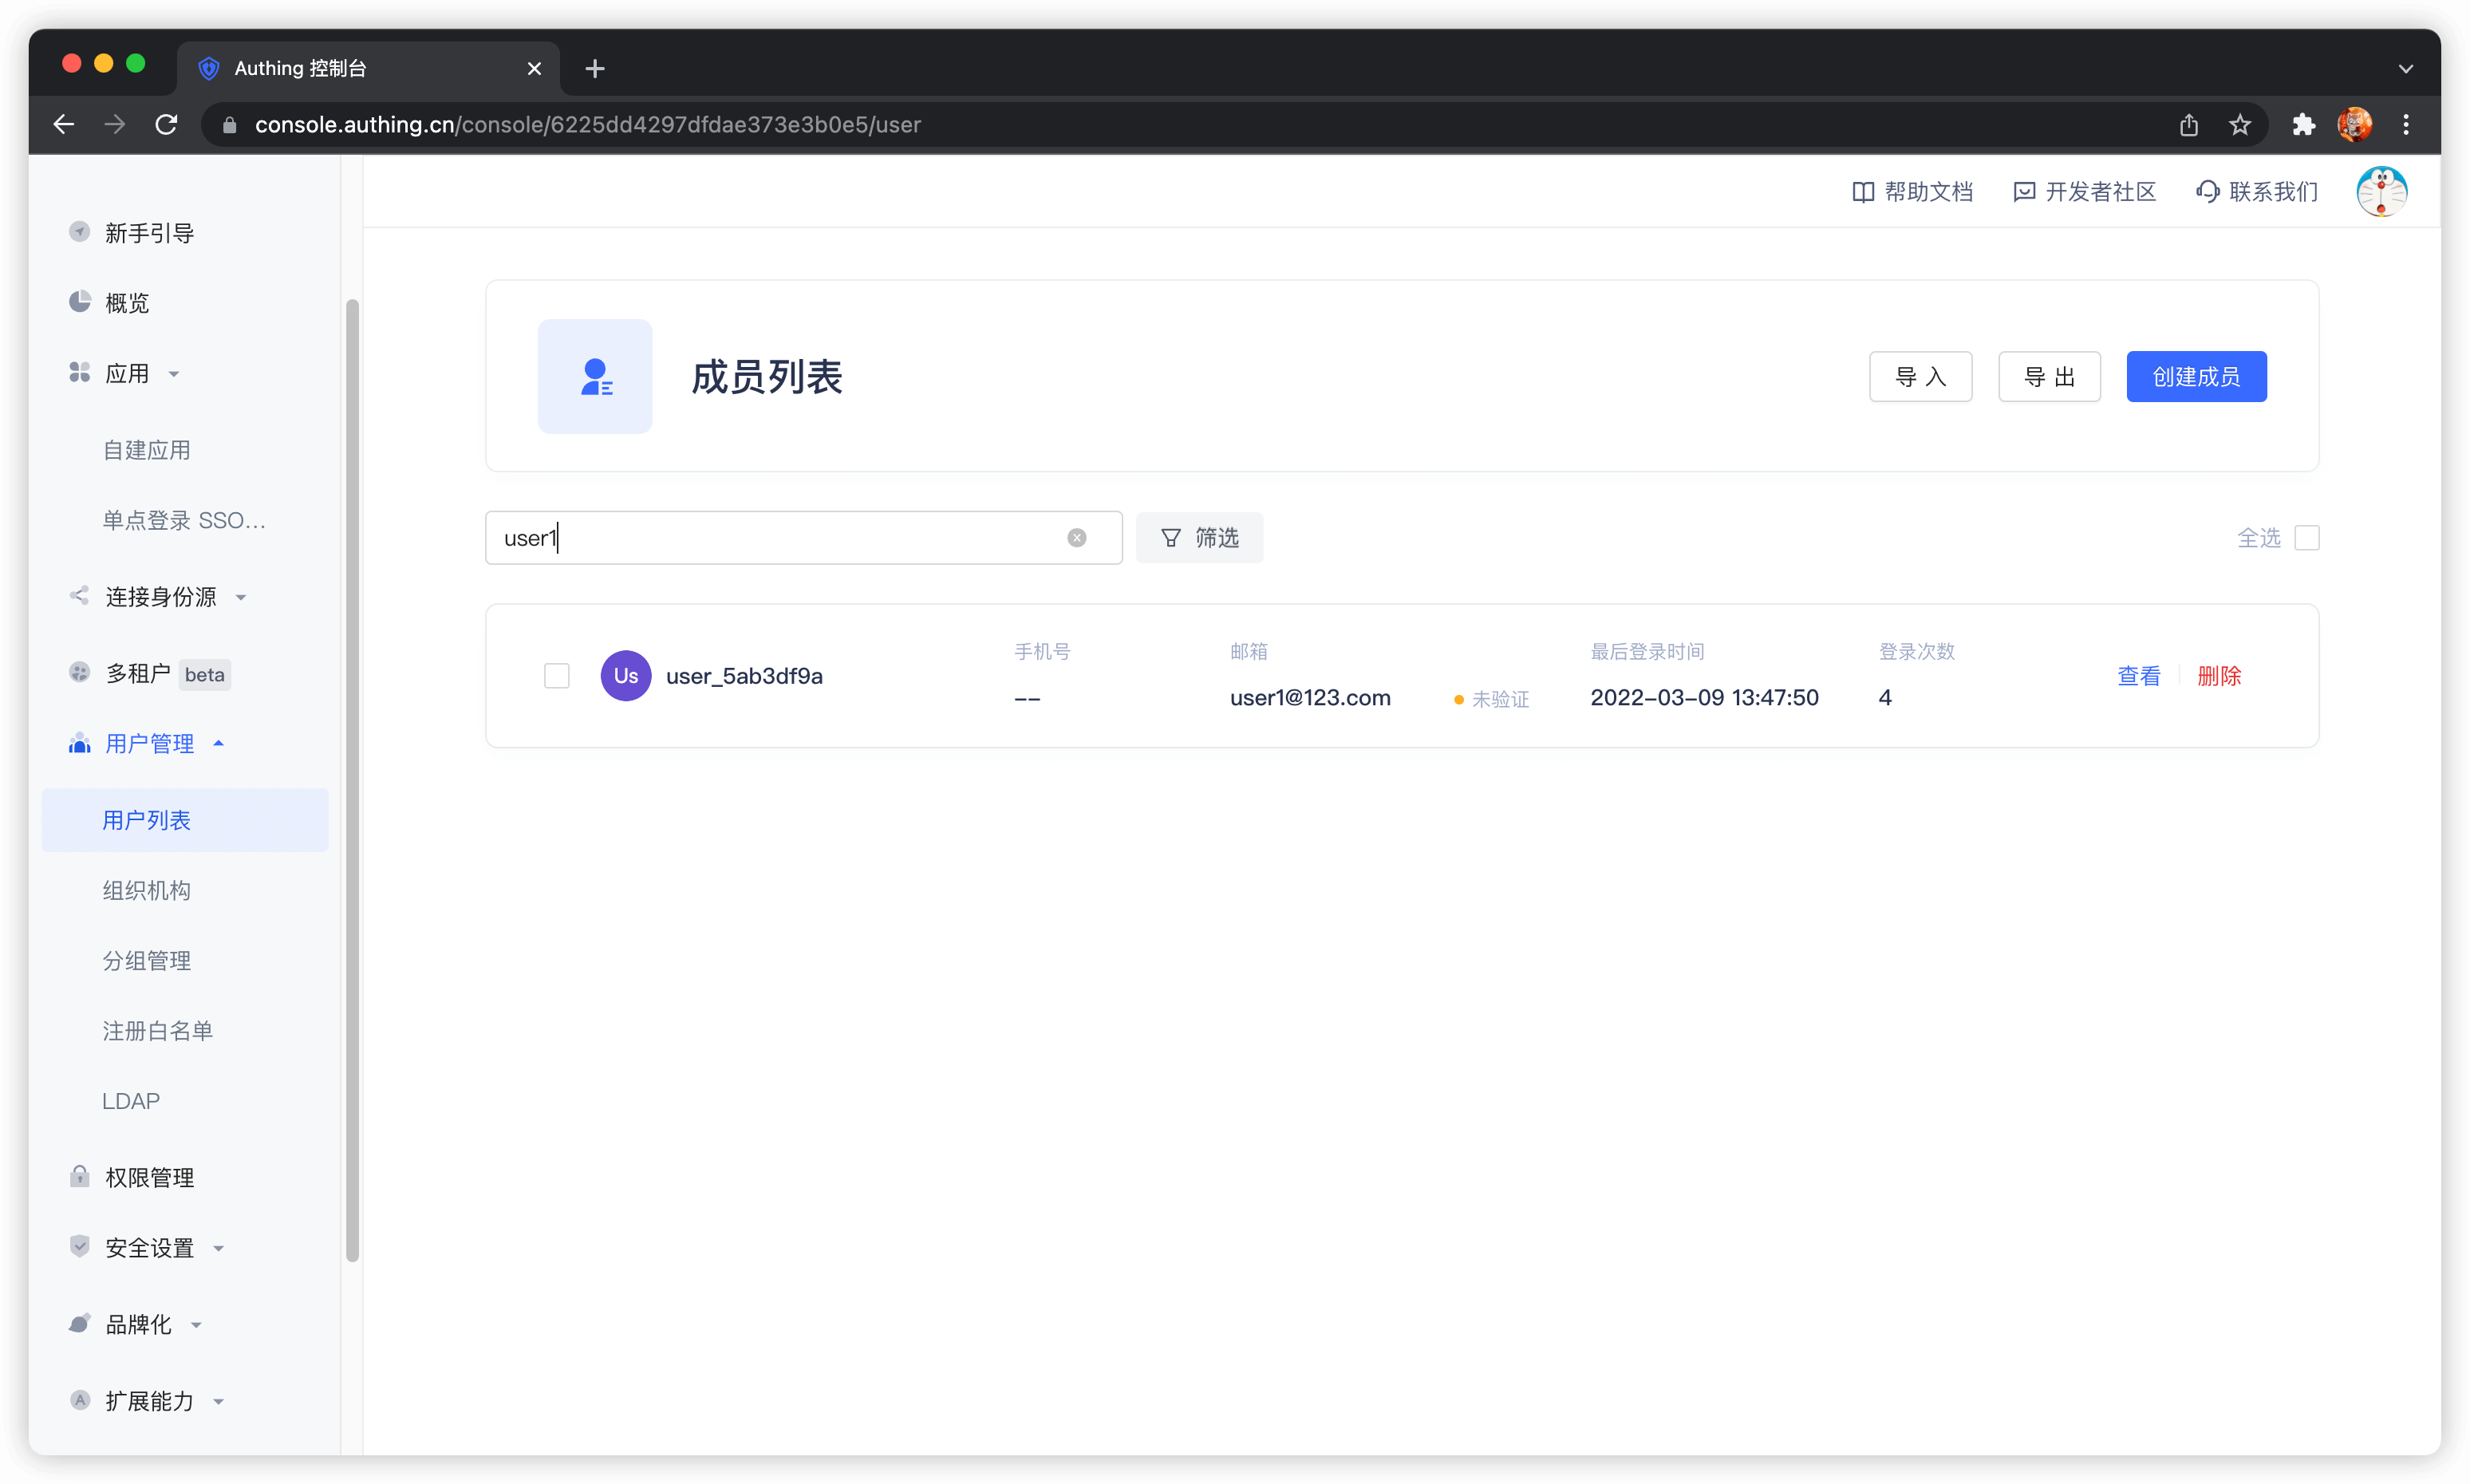
Supported search fields include email, username, phone number, nickname, etc.
Use SDK search
GenAuth supports SDKs in multiple programming languages including Java, JavaScript/Node.js, Python, PHP, C#, Swift, Go, Ruby, WeChat Mini Program, etc. You can choose the SDK you are familiar with:
You can use the search user method of the User Management Module (UsersManagementClient) in each language.
Cloud LDAP User Directory using GenAuth
GenAuth supports viewing, modifying, adding, and deleting user information using the LDAP protocol. This page contains some basic information and usage tutorials. If you don't know what the LDAP protocol is, you can read the concepts - What is LDAP first. GenAuth LDAP 2.0 requires the use of identity automation related capabilities. If you don't know, you can read the Identity Automation related concepts first.
Version Notes
The GenAuth LDAP 2.0 based on OpenLDAP was released on April 12, 2023. It is recommended to use the GenAuth LDAP 2.0 version; to use LDAP 2.0, you need to enable Identity Automation first; if you still need to use the old version of LDAP, you can still refer to LDAP 1.0. To understand the differences between LDAP 1.0 and 2.0, you can view (Differences between LDAP 1.0 and LDAP 2.0) [#Differences between ldap-1-0- and -ldap-2-0-]
Migrate to LDAP 2.0
Differences between LDAP 1.0 and LDAP 2.0
Differences in DN
GenAuth LDAP 1.0 has some differences in directory structure from LDAP 2.0. The following is the basic structure of DN for LDAP 1.0:
# User DN
uid=USER_ID,ou=DEPARTMENT_NAME,o=ORG_NAME,ou=users,o=USER_POOL_ID,dc=authing,dc=cn

# Department DN
ou=DEPARTMENT_NAME,o=ORG_NAME,ou=users,o=USER_POOL_ID,dc=authing,dc=cn
The basic structure of DN in LDAP 2.0 is as follows:
# User DN
cn=xxx,ou=DEPARTMENT_NAME,ou=DEPARTMENT_NAME,dc=DOMAIN1,dc=DOMAIN2,o=authing

# Department DN
ou=DEPARTMENT_NAME,ou=DEPARTMENT_NAME,dc=DOMAIN1,dc=DOMAIN2,o=authing
From the above two DNs, we can see the following differences:
Base DN will be different. The Base DN of LDAP 1.0 is composed of
ou=users,o=USER_POOL_ID,dc=authing,dc=cn, and the Base DN of LDAP 2.0 is composed ofdc=DOMAIN1,dc=DOMAIN2,o=authing,DOMAIN1andDOMAIN2are decomposed from the domain name you entered when initializing LDAP.The RDN of the user DN in LDAP 1.0 is
uid=USER_ID, and the RDN of the user DN in LDAP 2.0 iscn=xxx, and the value ofxxxis determined by the field mapping in Identity Automation.
Differences in user attributes
Searching for users in LDAP 1.0 will return all basic attributes and extended fields of the user GenAuth, while the user attributes returned in LDAP 2.0 are completely determined by your configuration in the data conversion node of Identity Automation.
Potential risks
- Due to inconsistent directory structures, the organizational information and other information in the LDAP downstream applications you previously connected to will also change after connecting to LDAP2.0.
- The login fields may change. For example, if you previously used the
emailfield for LDAP login, but if you did not map the user mailbox of GenAuth to theemailfield in the LDAP service in LDAP 2.0, LDAP authentication using theemailfield will fail.
Solution
If migration is required, you need to map all user basic attributes to LDAP first. If you used extended fields before, you also need to map them to the AuthingExtendedAttr1~AuthingExtendedAttr20 fields. After the downstream synchronization workflow is executed, you need to modify the Base DN, Bind DN, and Bind DN Password in the previously connected application, and test whether it can be used normally.
Configure LDAP
Go to Organization -> LDAP menu and click "Initialize LDAP". 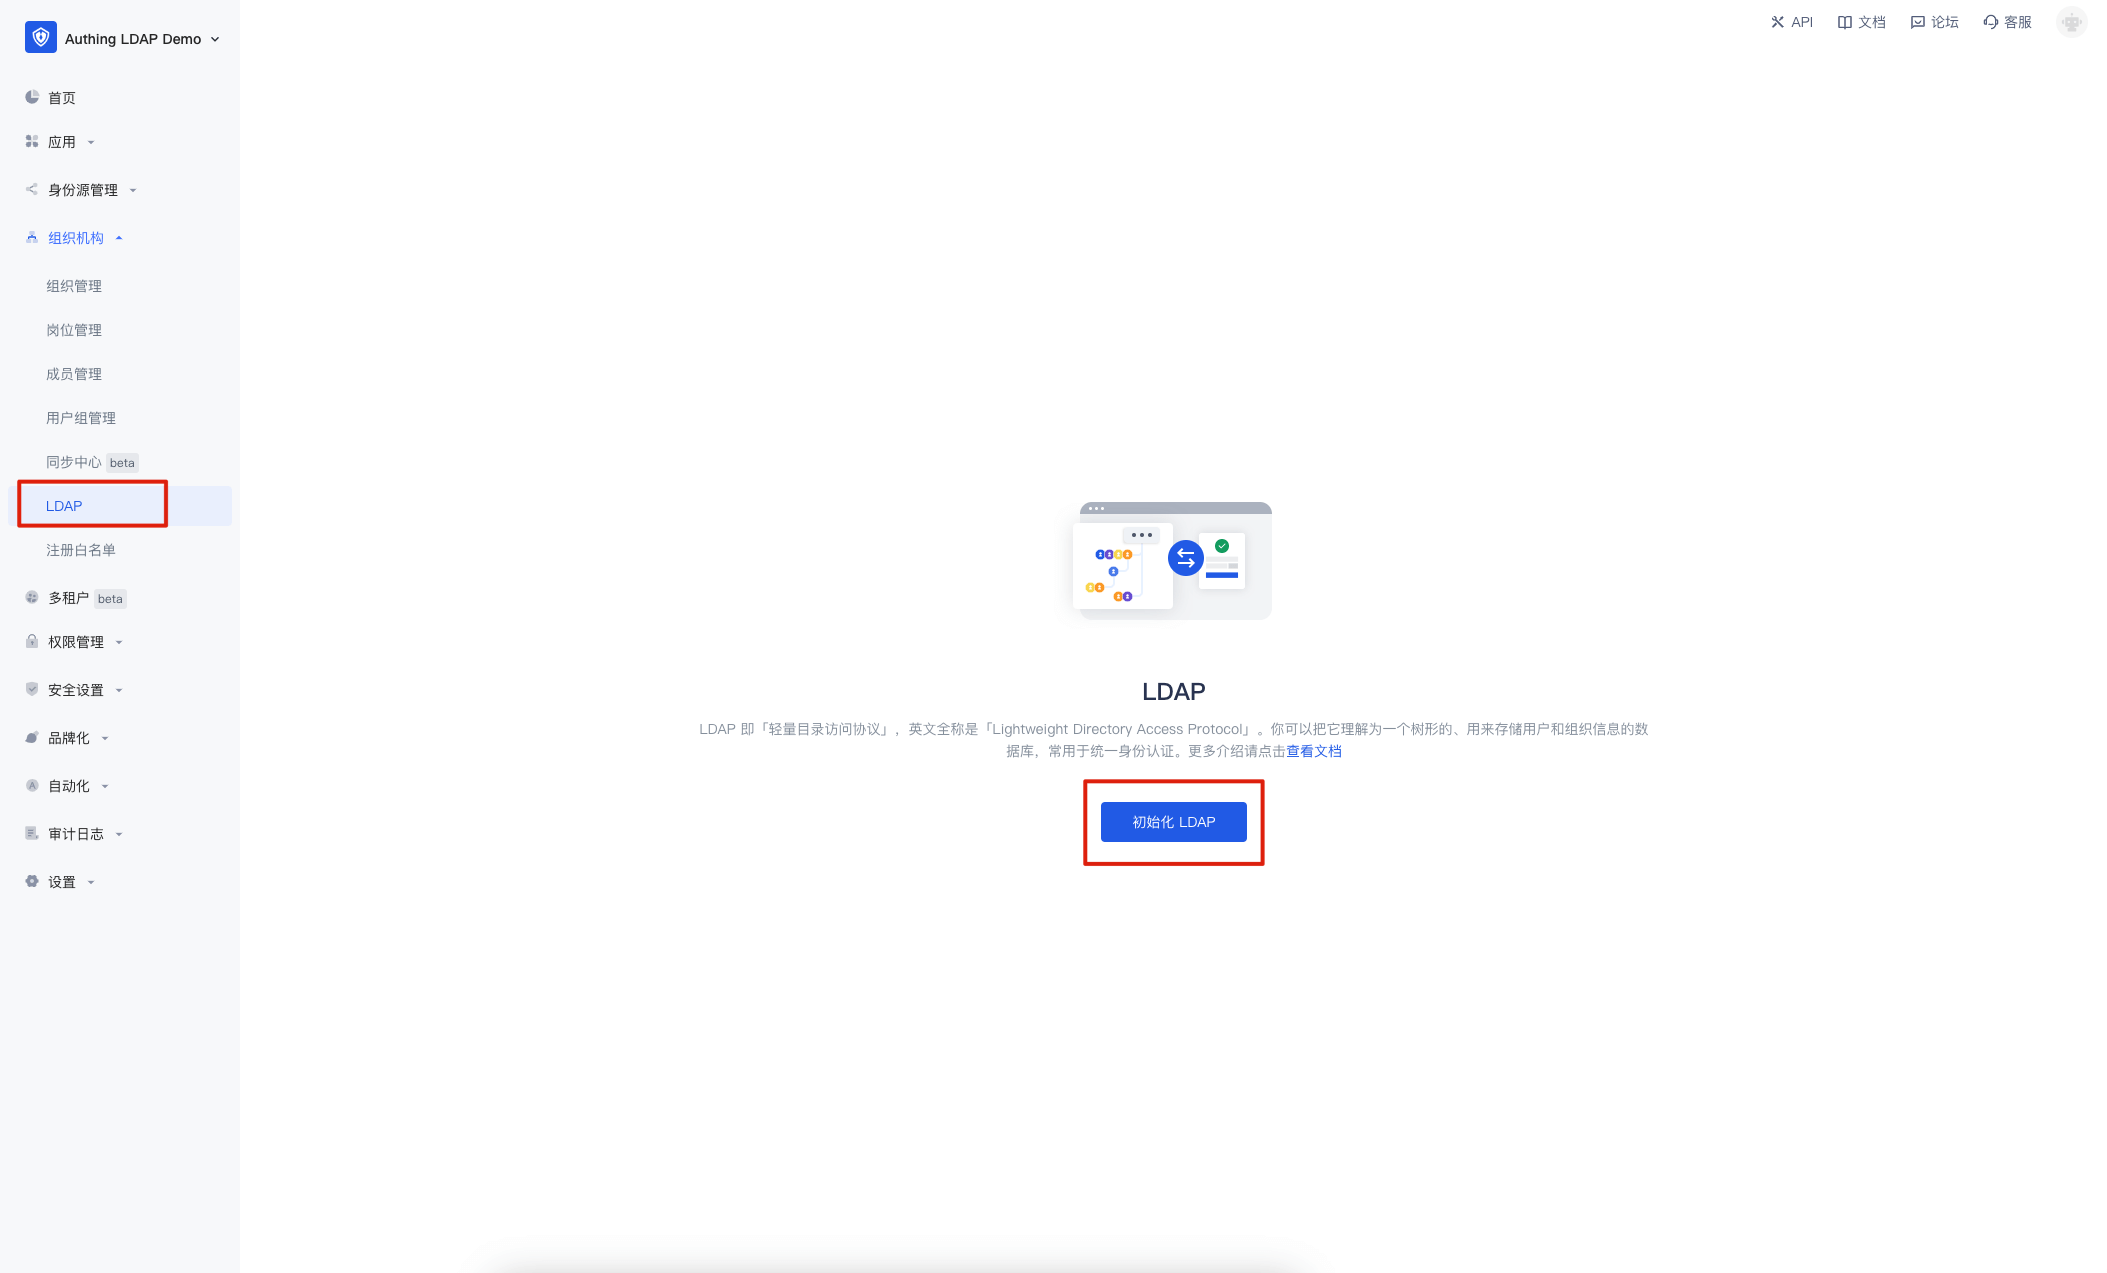
In the pop-up window, enter the LDAP domain name you want to set and click "Initialize". This domain name will eventually be used to generate your LDAP Base DN. If you enter example.com, the final generated is dc=example,dc=com,o=authing. 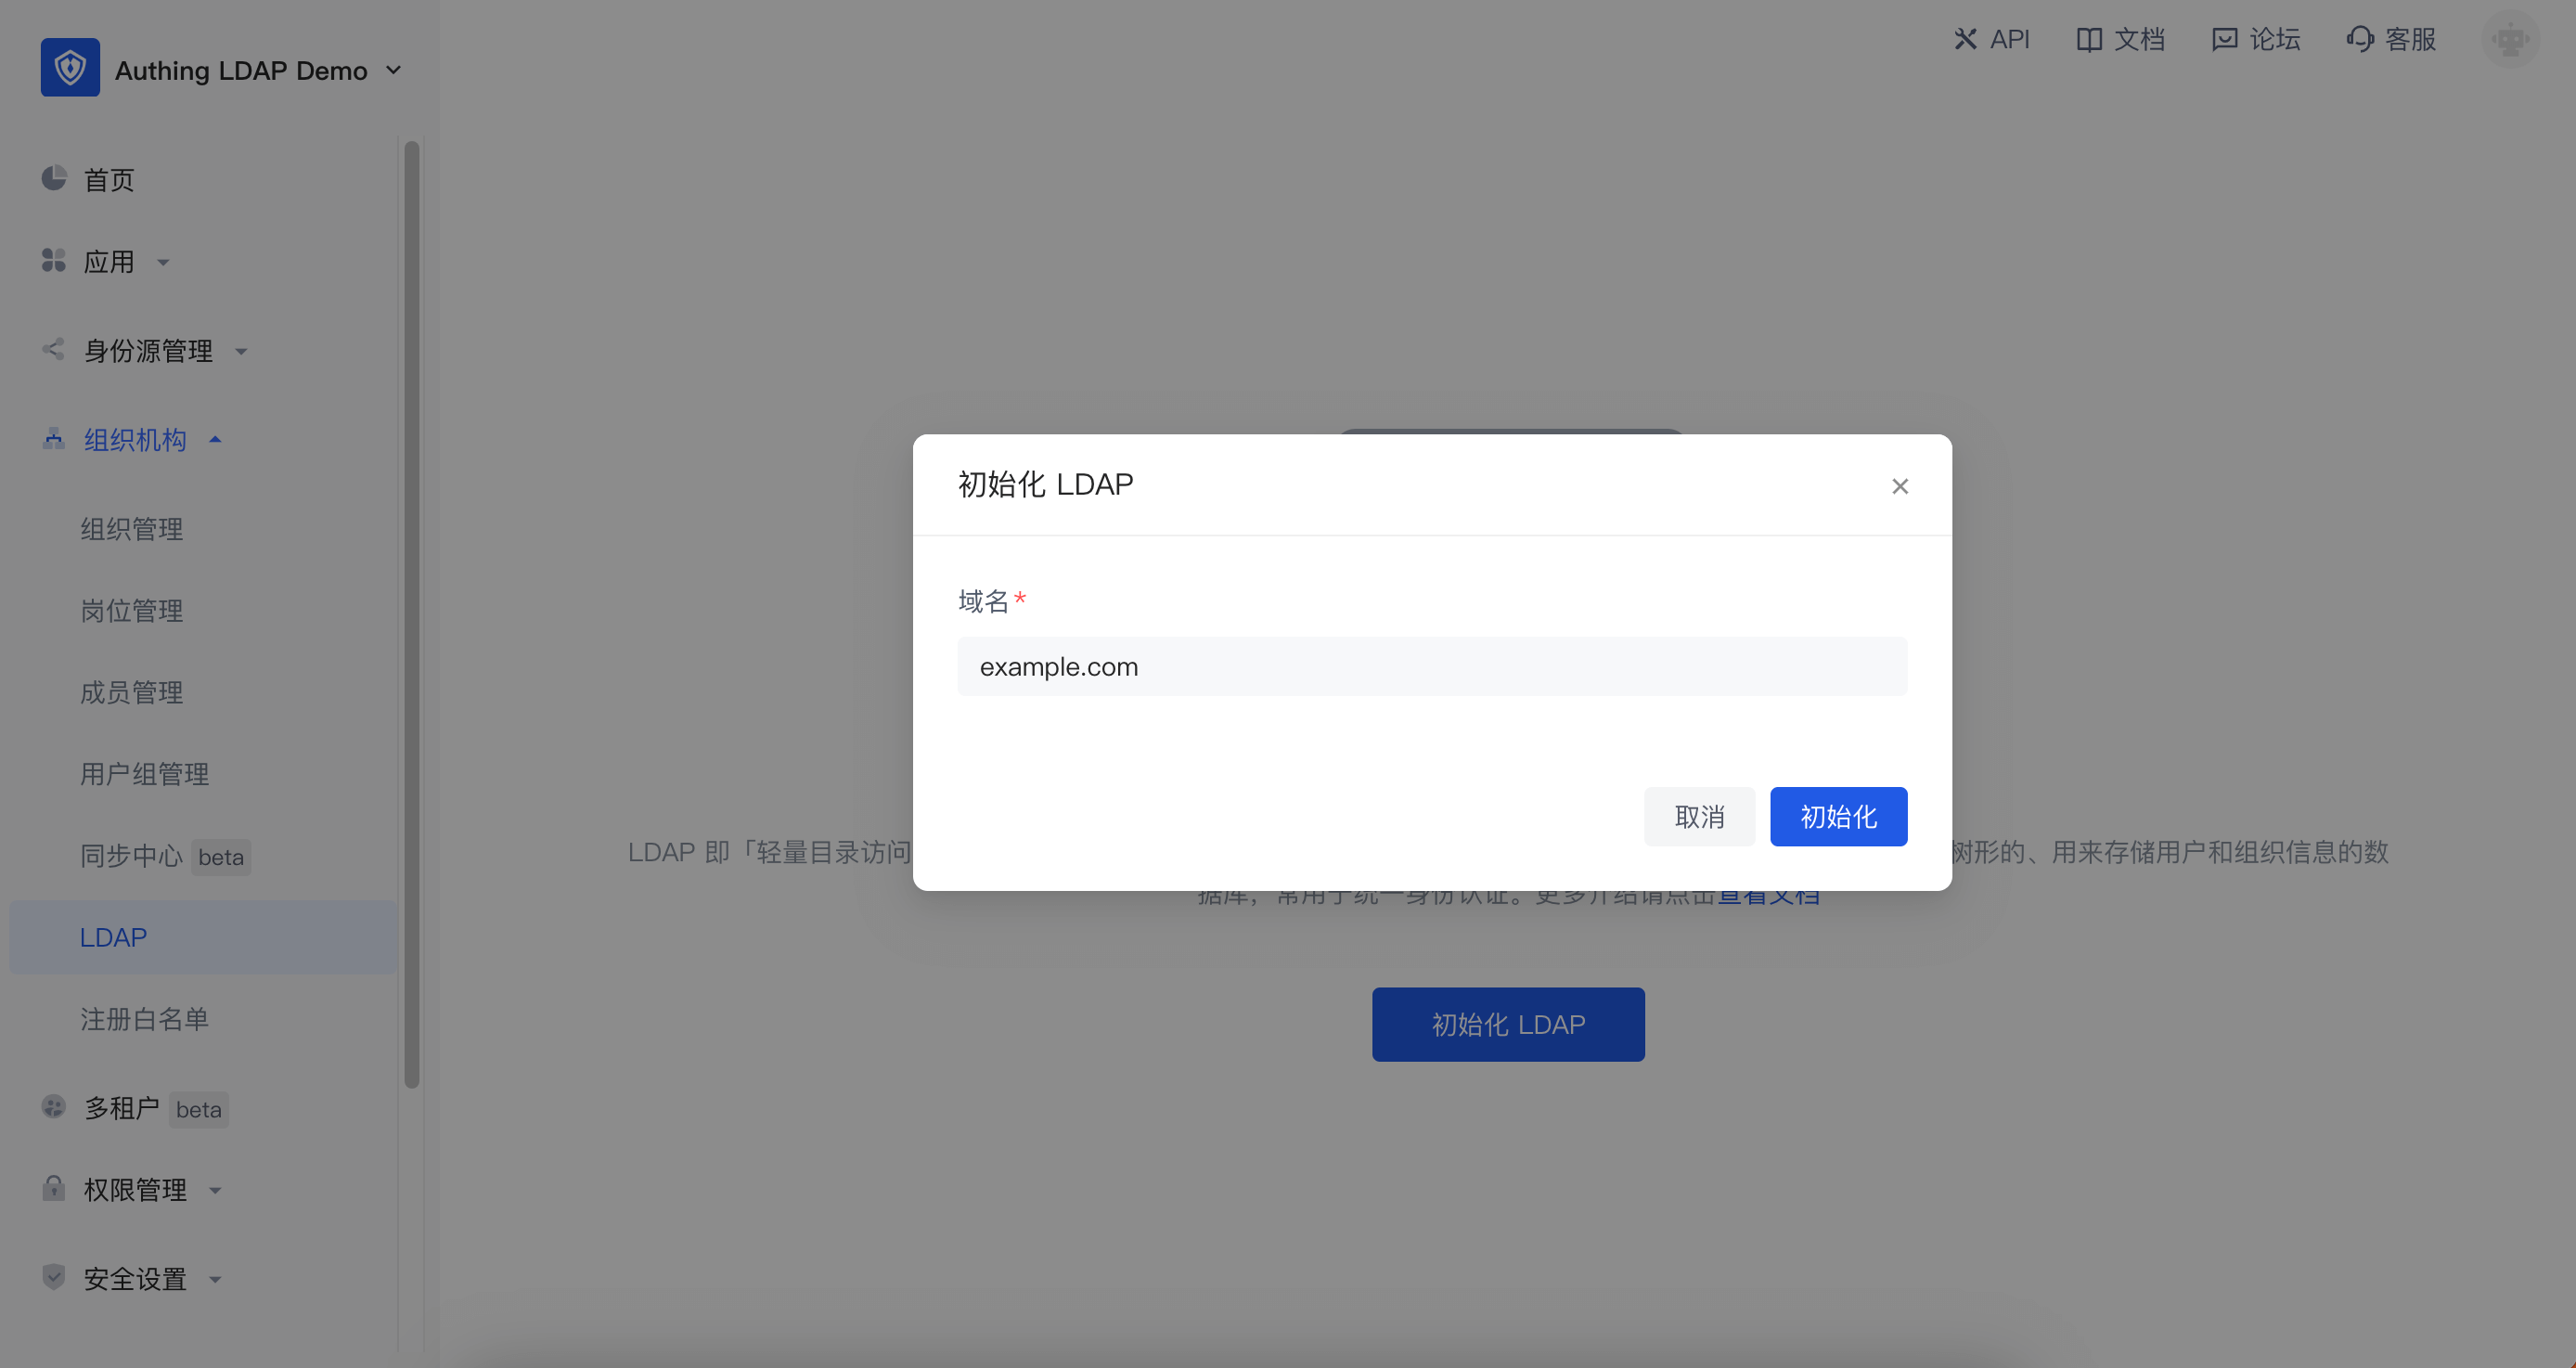
After initialization, there is no user data in the LDAP service. GenAuth will automatically create a workflow for your LDAP service to synchronize the user data of GenAuth to the LDAP service. You need to click the "Automation" button in the upper right corner to enter the identity automation interface for configuration. 
Currently, GenAuth automatically creates three workflows for you:
- LDAP upstream full synchronization: used to synchronize all data in the LDAP service back to the GenAuth organizational structure. If you do not need to modify user data through the LDAP protocol, it is recommended to turn it off.
- LDAP downstream full synchronization: used to synchronize all GenAuth organizational structure data to the LDAP service. It is recommended to set its trigger to scheduled task. After initializing LDAP for the first time, you can manually execute this workflow once to synchronize users to the LDAP service.
- LDAP downstream incremental synchronization: used to incrementally synchronize GenAuth organizational structure data to the LDAP service.
- If you want to use a third-party LDAP service, you can modify the account connection in the LDAP configuration node.
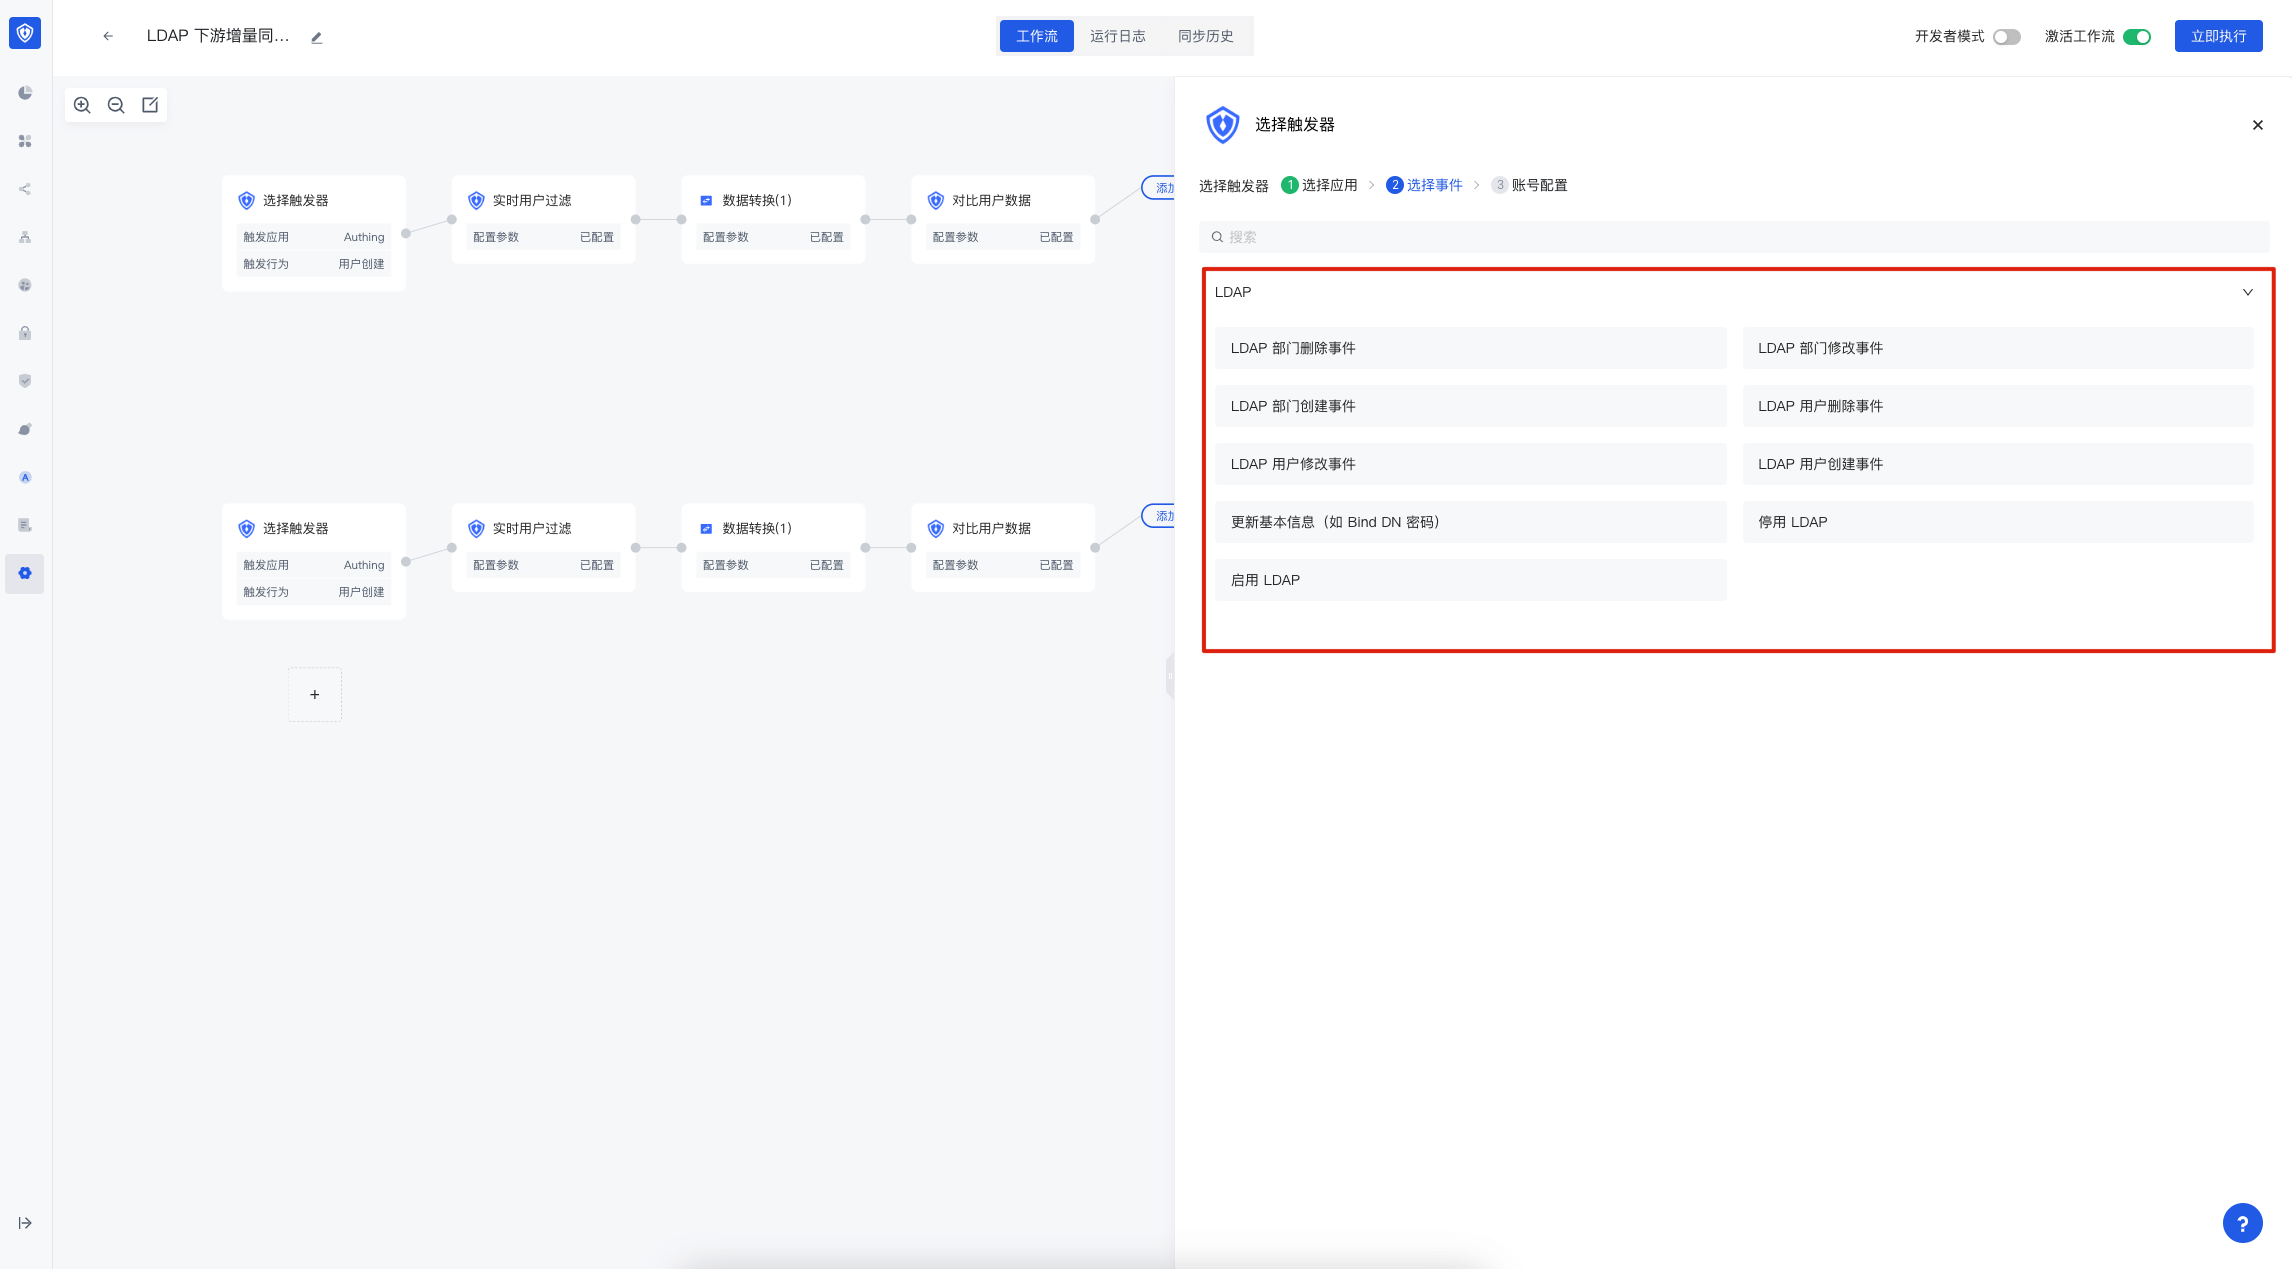
 How to select events
If you need to modify more configurations of the workflow, you can refer to Identity Automation. 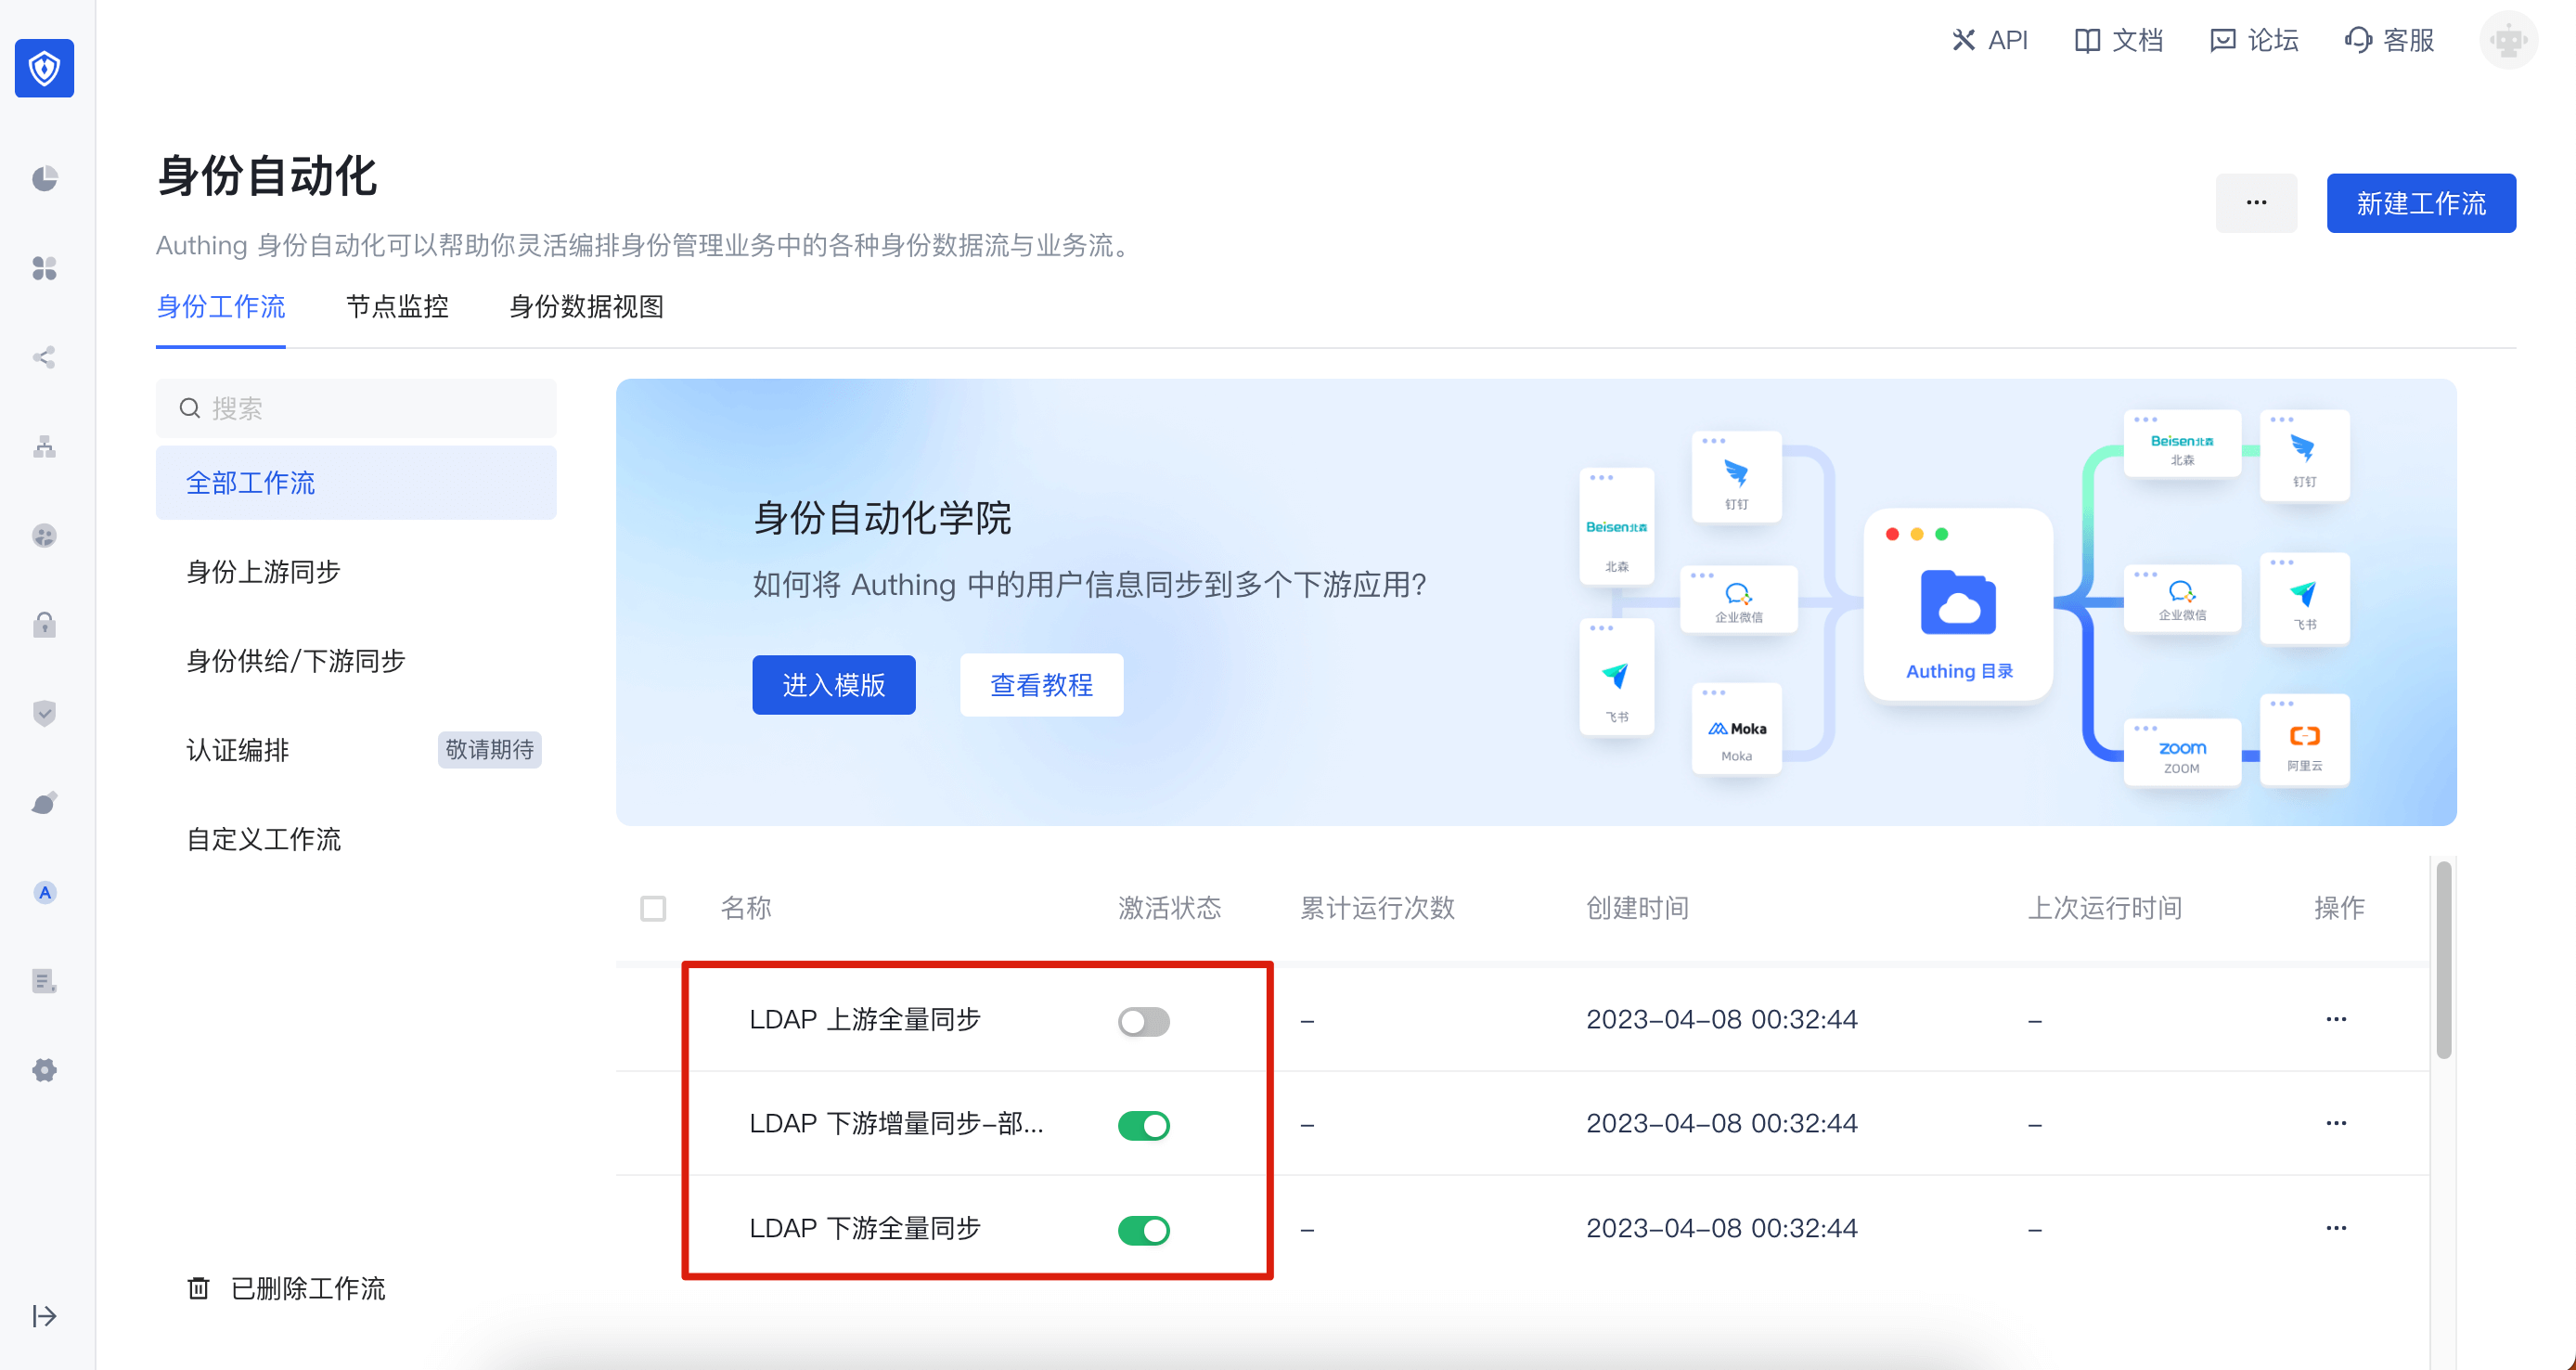
Using LDAP
The following will introduce the simple use of LDAP. All commands related to LDAP search are demonstrated using the ldapsearch tool.
Basic information
Connection information
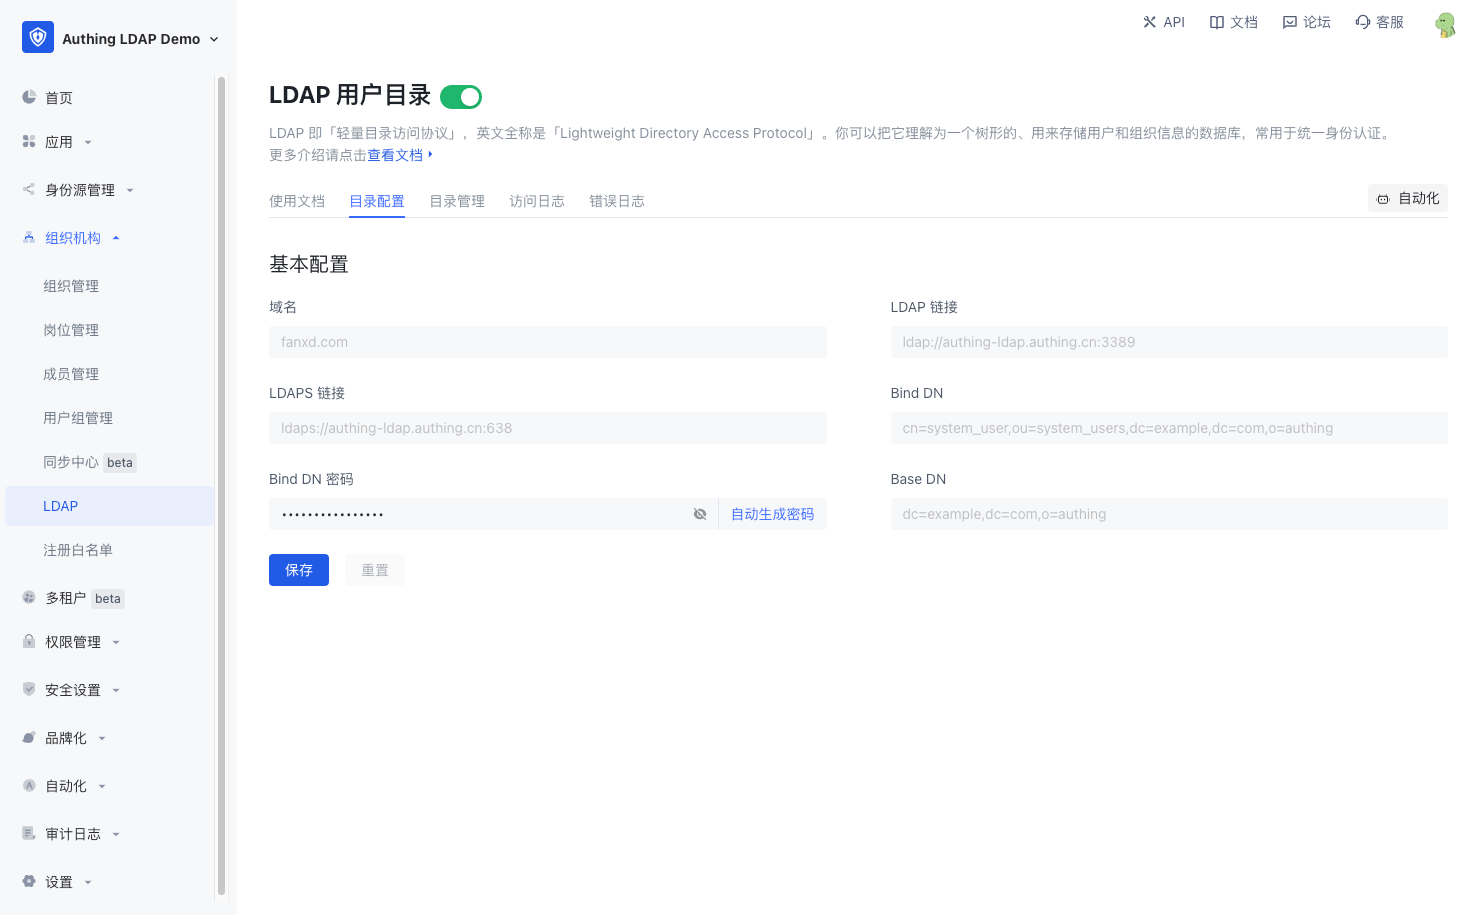
GenAuth The basic connection information of LDAP can be obtained in the Directory Configuration interface of LDAP. The configuration information is as follows:
- Domain name: the LDAP domain name you entered
- LDAP link: the domain name, port and other information of the LDAP service
- LDAPS link: the domain name, port and other information of the service connected using LDAPS
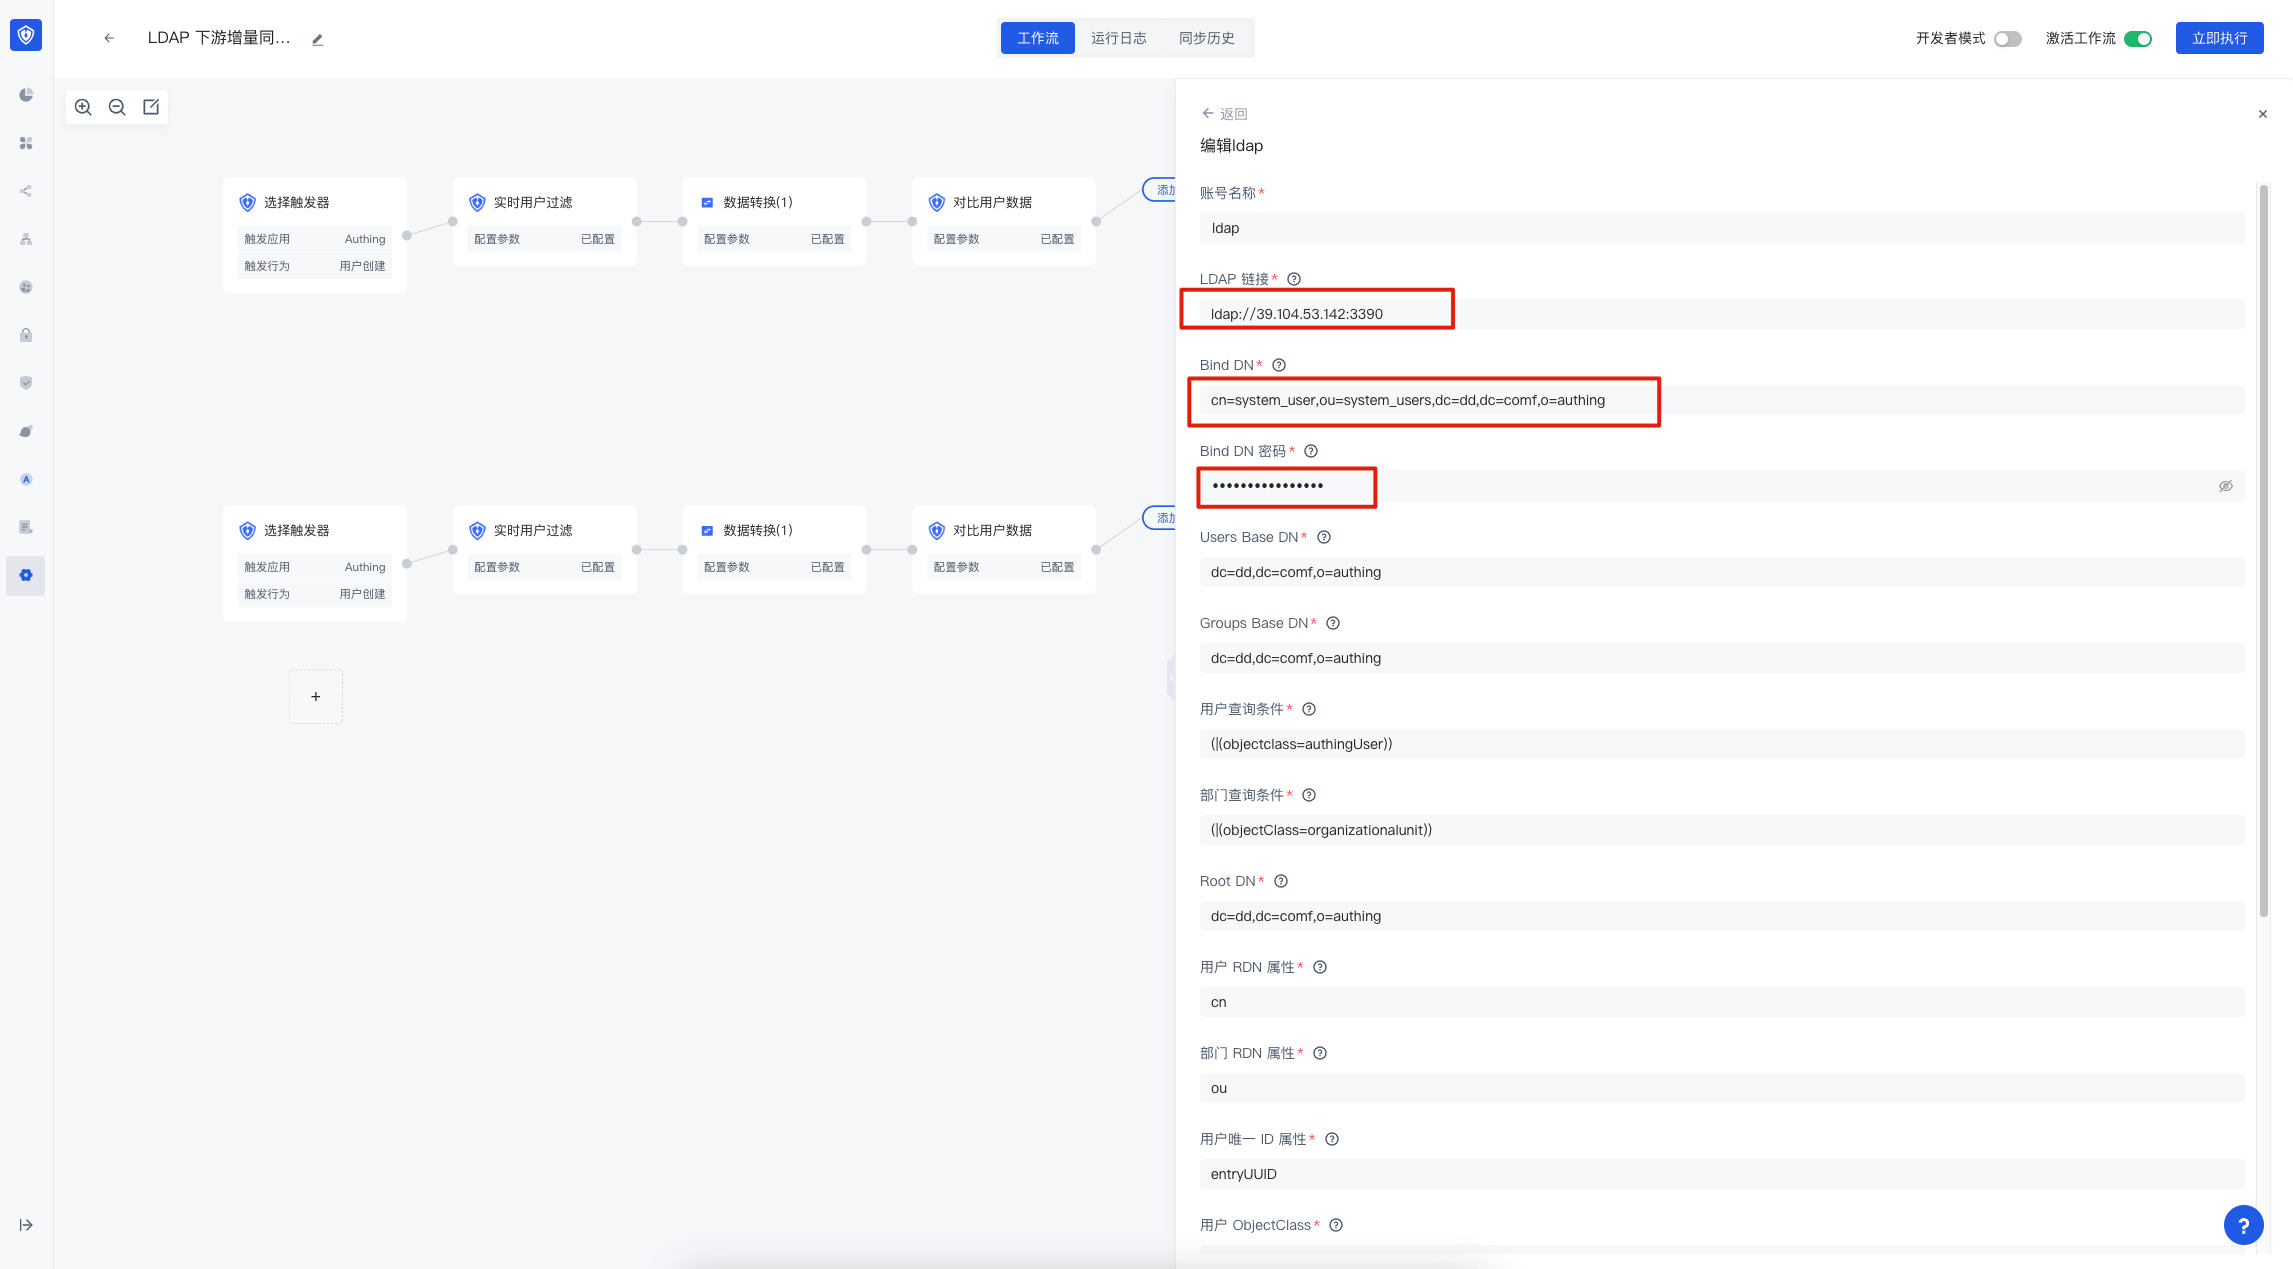
- Bind DN: the account used to connect to the LDAP service
- Bind DN password: the password used to connect to the LDAP service. It cannot be modified manually. If you need to modify it, you can click "Auto-generate password" and save it
- Base DN: the base DN for searching LDAP
LDAP user attributes
GenAuth The public cloud defines the authingUser objectClass in the LDAP service, which contains the following attributes:
| Attribute name | Remarks | Required or not |
|---|---|---|
| id | User ID | Yes |
| cn | User name | Yes |
| externalId | External ID | No |
| No | ||
| emailVerified | emailVerified | No |
| phone | Mobile number | No |
| phoneVerified | phoneVerified | No |
| username | User name | No |
| nickname | Nickname | No |
| company | Company | No |
| authingPhoto | Avatar url | No |
| name | Name | No |
| givenName | First name | No |
| familyName | Surname | No |
| middleName | middleName | No |
| preferredUsername | Preferred username | No |
| website | Personal website | No |
| gender | Gender | No |
| birthdate | Birthday | No |
| zoneinfo | Time zone | No |
| address | Address | No |
| formatted | formatted | No |
| authingStreetAddress | Street information | No |
| locality | Locality | No |
| region | Region | No |
| postalCode | Postal code | No |
| city | City | No |
| province | Province | No |
| country | Country | No |
| AuthingExtendedAttr1 | Extended field 1 | No |
| AuthingExtendedAttr2 | Extended field 2 | No |
| AuthingExtendedAttr3 | Extended field 3 | No |
| ... | ... | No |
| AuthingExtendedAttr20 | Extended field 20 | No |
As described in the table above, the LDAP service contains almost all the basic fields of the user, as well as AuthingExtendedAttr1~AuthingExtendedAttr20 has 20 extended fields, which are used to map the user's extended fields to the LDAP service. You can perform specific field mapping in the Data Conversion Node of Identity Automation.
Search
Based on the Base DN, the returned results include user data and organization data. -LLL means that information that does not match the filter condition is prohibited from being output. Without this option, you will get the number of entries in the obtained results and the requested partial information.
$ ldapsearch -H LDAP_SERVER_URL -x -D "LDAP_BASE_DN" -w "LDAP_BIND_DN_PASSWORD" -LLL -b "LDAP_BIND_DN"Search Filter
Search and filter based on Base DN, and the returned results include user data and organization data.
For all filtering functions, please refer to RFC-2254
Equality
This search is based on cn, because organizations do not have this attribute, only users have this attribute, and the result will return the user information whose cn is Xiaobai.
$ ldapsearch -H LDAP_SERVER_URL -x -D "LDAP_BASE_DN" -w "LDAP_BIND_DN_PASSWORD" -LLL -b "LDAP_BIND_DN" -s sub '(cn=小白)'不等
Similar to 不等, this option searches for all information in LDAP that has the cn (user name) attribute and the attribute value is not U, because organizations do not have this attribute, only users have this attribute, and the result will return the entry information where the user name is not hahhaha (in fact, only users have the cn attribute, so the result is all user information).
$ ldapsearch -H LDAP_SERVER_URL -x -D "LDAP_BASE_DN" -w "BIND_DN_PASSWORD" -LLL -b "$LDAP_BIND_DN" -s sub '(!(cn=hahhaha))'Search mode
base mode (only search for baseDN information)
base mode will only search and return BaseDN information
dn: LDAP_BASE_DN
...attribute related information...$ ldapsearch -H LDAP_SERVER_URL -x -D "LDAP_BASE_DN" -w "LDAP_BIND_DN_PASSWORD" -b "LDAP_BIND_DN" -s baseone mode (only search for subnodes under baseDN information)
Taking the above figure as an example, one mode will search for BaseDN and BaseDN child nodes and returns relevant information.
dn: LDAP_BASE_DN
...property related information...

dn: cn=xxx,LDAP_BASE_DN
...property related information...

dn: ou=xxx,LDAP_BASE_DN
...property related information...$ ldapsearch -H LDAP_SERVER_URL -x -D "LDAP_BASE_DN" -w "LDAP_BIND_DN_PASSWORD" -b "LDAP_BIND_DN" -s onesub mode (search for all nodes under baseDN information)
Taking the above figure as an example, the sub mode will search for BaseDN and all nodes under BaseDN and return relevant information.
dn: LDAP_BASE_DN
...property related information...

dn: cn=xxx1,LDAP_BASE_DN
...property related information...

dn: ou=xxx,LDAP_BASE_DN
...property related information...

dn: cn=xxx2,o=develop,LDAP_BASE_DN
...property related information...$ ldapsearch -H LDAP_SERVER_URL -x -D "LDAP_BASE_DN" -w "LDAP_BIND_DN_PASSWORD" -b "LDAP_BIND_DN" -s subFilter the returned results (return only the specified attributes)
If you have used SQL, this function is similar to select. Without adding filters, the result may be as follows:
dn: LDAP_BASE_DN
cn: testcn
sn: testsn
...other attributes...
Add relevant filter conditions as shown in the figure, and the result will be as follows
dn: LDAP_BASE_DN;
cn: testcn;$ ldapsearch -H LDAP_SERVER_URL -x -D "LDAP_BASE_DN" -w "BIND_DN_PASSWORD" -b "$LDAP_BIND_DN" -s sub dn cnAdd
Create a file named user.ldif and copy the following content into it:
dn: (cn = username), LDAP_BASE_DN;
objectClass: authingUser;
cn: username;
Then execute the following command:
This operation will add a new user in the LDAP service user
$ ldapadd -H LDAP_SERVER_URL -x -D "LDAP_BASE_DN" -w "BIND_DN_PASSWORD" -f ./user.ldifIf you have LDAP upstream synchronization enabled in your workflow, this data will be synchronized back to the GenAuth user pool.
Modify
Create a file named modify.ldif and copy the following content into it:
dn: cn=username, ou=xxx, LDAP_BASE_DN
changetype: modify
replace: mail
mail: test@example.com
Then execute the following command:
This operation will search for relevant user information in LDAP service according to DN in modify. If the search is successful, the operation user information will be selected according to changetype. information comes from the information under changetype
$ ldapmodify -H LDAP_SERVER_URL -x -D "LDAP_BASE_DN" -w "BIND_DN_PASSWORD" -f ./modify.ldifIf you have enabled LDAP upstream synchronization in the workflow, this data will be synchronized back to the GenAuth user pool.
Delete
This operation will search for relevant user information based on DN in LDAP service. If the search is successful, it will be deleted. This is a sensitive operation.
$ ldapdelete -H LDAP_SERVER_URL -x -D "LDAP_BASE_DN" -w "BIND_DN_PASSWORD" "cn=username, ou=xxx, LDAP_BASE_DN"If you have enabled LDAP upstream synchronization in the workflow, this data will also be deleted in the GenAuth user pool.
Other
compare
This operation is used to determine whether the DN value and the specified entry value in the LDAP Server directory tree belong to the same entry. If yes, it returns true, otherwise it returns false
$ ldapcompare -H LDAP_SERVER_URL -x -D "LDAP_BASE_DN" -w "BIND_DN_PASSWORD" "uid=uid,o=oid,LDAP_BASE_DN" "cn:xxx"modifyDN
It is used to modify the RDN entry in the LDAP Server. It can be entered from the standard entry information. RDN refers to the first item of DN, such as cn=oldUserName in "cn=oldUserName, o=Org_ID, LDAP_BASE_DN" "cn=newUserName". Since most of the information related to user's DN and organizational structure's DN are id related values, when you modify cn=oldUserName is actually equivalent to modifying the username
$ ldapmodrdn -H LDAP_SERVER_URL -x -D "LDAP_BASE_DN" -w "BIND_DN_PASSWORD" "cn=oldUserName,o=Org_ID,LDAP_BASE_DN" "cn=newUserName"whoami
Used to verify the identity of the LDAP server. If you enter the correct bind DN and password, the specified information will be returned. Otherwise, the error ldap_bind: invalid credentials(49) will be prompted. This is generally caused by wrong password. Please check the corresponding password and bind DN information. Returns information test@example.com
$ ldapwhoami -H LDAP_SERVER_URL -x -D "LDAP_BASE_DN" -w "BIND_DN_PASSWORD"LDAP Events
If you want to use LDAP related events in identity automation, you can select LDAP application in Triggers, and then select events.